



Classic Car LED Tail Light Conversion Kits: 2026 Guide

Table of Contents
- Why Switch Your Classic to LED Tail Lights?
- Best Classic Car LED Tail Light Conversion Kits
- Sequential LED Tail Light Conversion: How It Works
- LED Tail Light Load Resistor Installation vs. Flasher Relays
- Classic Car Lighting Safety Upgrades and DOT Compliance
- How to Choose the Right Kit for Your Vehicle
- Conclusion: Modernize Your Classic Safely
- Frequently Asked Questions
Last Updated: September 9, 2026
Why Switch Your Classic to LED Tail Lights?
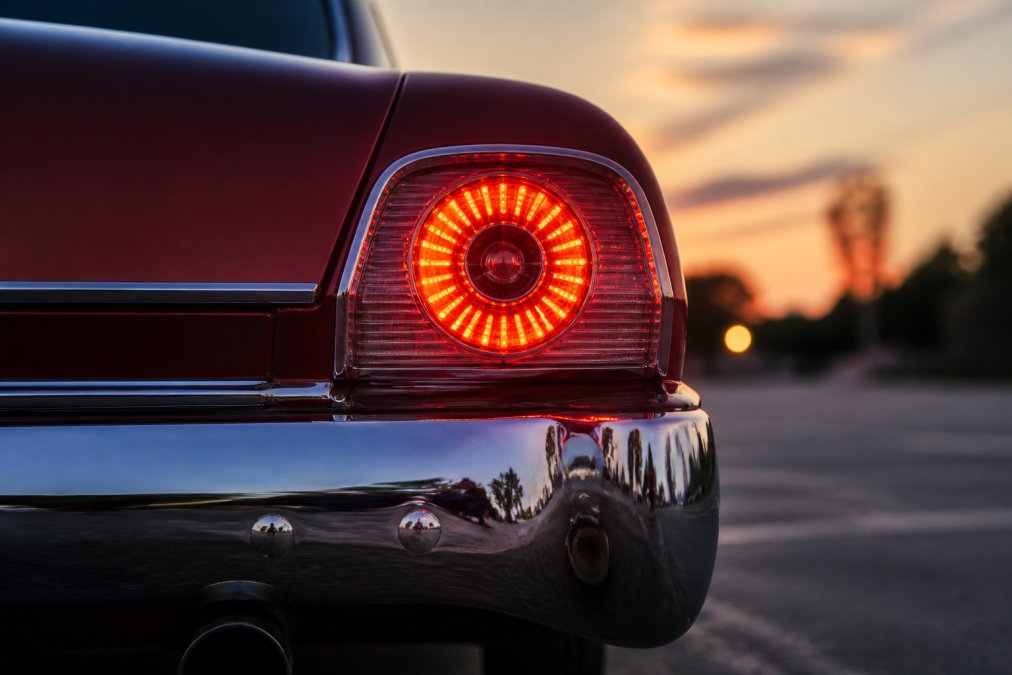
Factory incandescent bulbs in a 1967 C10 or an 87 Fox Body Mustang are dim, slow to illuminate, and prone to failure. A classic car LED tail light conversion kit solves all three problems at once by swapping the outdated bulb-and-reflector setup for a modern circuit board packed with high-output LEDs.
The best classic car LED tail light conversion kits use a direct-fit conversion that replaces the internal board while keeping your original chrome housing and lens intact.
Best Classic Car LED Tail Light Conversion Kits
The market splits into two camps: cheap universal LED bulbs that require load resistors and careful wiring, and vehicle-specific kits engineered for your exact year and model. For plug-and-play installation without custom fabrication, the second camp is the only sensible choice.
| Kit | Vehicle Fitment | Price | Key Feature |
|---|---|---|---|
| RestoLights C10 Kit | 1967-1972 Chevy C10 | $142.99 | 10 selectable flash sequences |
| RestoLights C10 Kit | 1973-1987 Chevy C10 | $159.99 | 10 sequential patterns |
| RestoLights G-Body Kit | 1981-1987 Buick Regal | $179.99 | Digital flasher relay included |
| Oracle Lighting Kit | 1987-1993 Mustang LX | $389.95 | True plug-and-play, 3X brighter |
| Digi-Tails Cutlass Kit | 1981-88 Olds Cutlass | $229.00 | 114 red LEDs per side |
1967-1972 Chevrolet C10 RestoLights Kit: Best for 2nd Gen Trucks
For owners of the second-generation C10, this is the kit we recommend first. It includes two sequential red LED circuit boards, 1156 white LED reverse bulbs, and an electronic flasher. The turn signals feature 10 selectable flash sequences, and the kit also fits C20, K10, and K20 models in the same year range. At $142.99, it delivers the full package.

1981-1987 Buick Regal & Grand National RestoLights: Iconic G-Body Choice
The G-body Regal and Grand National crowd gets a kit that guarantees precise fitment. You get red LED running, brake, and turn signal lighting plus enhanced white reverse illumination. At $179.99, it is the cleanest way to modernize the iconic G-body rear end.
Oracle Lighting 1987-1993 Mustang LX Kit: Premium Plug-and-Play
Fox Body owners have a different option: a true OEM+ conversion from Oracle Lighting that retains the factory LX lens design. The kit connects directly to the OEM wiring harness with no cutting, splicing, or tapping required. High-output LEDs deliver up to 3X the brightness of factory bulbs, and At $389.95 it is the premium pick, but for a clean Fox Body build that needs to stay plug-and-play, it is worth every dollar.
Sequential LED Tail Light Conversion: How It Works
A sequential LED tail light conversion replaces the single incandescent bulb with a circuit board of individually controlled LED diodes. Instead of the whole tail lamp board lighting at once, the controller fires the LEDs in a sweeping pattern, giving other drivers a clearer directional cue that you are changing lanes or turning.
The sequential turn signal pattern is handled by the board's built-in controller, which manages the timing of each LED diode. Most kits offer multiple selectable patterns, the RestoLights line, for example, gives you 10 that you can cycle through with the included adjustment screwdriver.
LED Tail Light Load Resistor Installation vs. Flasher Relays
Hyper-flashing is the number one reason DIY installers abandon their LED conversion halfway through. The root cause is electrical: your factory thermal flasher relay expects a specific current draw, typically 2.1 to 2.5 amps per turn signal circuit with incandescent bulbs. An LED board draws only 0.2 to 0.5 amps. The relay interprets this low draw as a burned-out bulb and cycles at double speed.
You have two paths to fix this, and the right one depends on your vehicle's wiring architecture and your tolerance for permanent modification.
Path 1: Electronic Flasher Relay Replacement (Preferred)
An electronic LED flasher relay uses a timing circuit instead of a thermal bi-metallic strip, maintaining a consistent flash rate regardless of load. This is the cleanest solution because it requires zero splicing into your factory harness.

Before ordering, identify your relay type. Most classic trucks and G-bodies from the 1960s through the 1980s use a 2-pin flasher located under the dash or in the fuse block. Some models, particularly certain Ford products and late-80s GM platforms, use a 3-pin unit with a separate ground reference. Pull your existing relay and count the terminals. A standard 2-pin replacement costs $8.00 to $15.00; a 3-pin unit with a ground wire runs $10.00 to $18.00.
Path 2: Load Resistors (When You Have No Choice)
Some vehicles, particularly those with combined brake/turn circuits or body control modules, do not accept a simple relay swap. In these cases, you need load resistors wired in parallel across each LED circuit.
The math is straightforward. A standard 1156 incandescent bulb draws about 2.1 amps at 12.8 volts; an LED board draws roughly 0.3 amps (bulbs.com). To simulate the missing 1.8 amps, using Ohm's law (R = V/I), 12.8 volts divided by 1.8 amps gives you approximately 7.1 ohms. Most installers use a 6-ohm resistor rated at 50 watts.
Wiring the Resistor Correctly
The most common installation error is wiring the resistor in series instead of parallel. In series, the resistor drops voltage to the LED, causing dim output and potential damage. In parallel, the resistor bypasses current around the LED while the LED still receives full voltage.
Solder the connections and cover them with heat shrink. Do not use crimp connectors alone, vibration from a classic car will eventually loosen them.
Testing Your Work
After installation, test all four functions: left turn, right turn, hazards, and brake lights. The flash rate should be 60 to 120 flashes per minute, which matches the FMVSS 108 requirement for turn signal frequency (ecfr.gov). If the rate is still too fast, your resistor value is too high. If the LEDs appear dim, your resistor is wired in series, not parallel.
Classic Car Lighting Safety Upgrades and DOT Compliance
The safety argument for LED conversions is well established: faster illumination, higher peak brightness, and longer service life. But the legal question, is this conversion street-legal?, is one that most product pages dodge entirely.
The Regulatory Framework
FMVSS 108 sets photometric requirements for light output, color, and beam pattern. For classic vehicles, the original equipment was certified to the standards in effect at the time of manufacture. When you retrofit LEDs, you are responsible for ensuring the modified lamp still meets those requirements.
The key photometric specifications are:
- Brake and tail lamps: Red light in the 380-410 nanometer wavelength range for the red hue. The intensity must be sufficient to be visible from 300 feet in daylight for brake lamps and 500 feet at night for tail lamps.
- Turn signals: Must be amber or red, depending on lamp position. The flash rate must be between 60 and 120 flashes per minute.
- Reverse lamps: Must emit white light only. A common mistake is installing an LED board that produces a blue-white hue, which can fail inspection.
What This Means for Your Conversion Kit
A quality direct-fit conversion kit is designed to work with your factory lens and housing, preserving the optical characteristics, beam pattern and light distribution. The LED board positions diodes to match the focal points of the original reflector.
Universal LED bulbs are where compliance gets murky. A drop-in 1156 LED bulb has a different light distribution than the incandescent it replaces. The LED emits light from a flat surface rather than a 360-degree filament, which can create dark spots in the reflector and fail the photometric test.
The Color Temperature Trap
LEDs are available in a range of color temperatures, and not all red LEDs are created equal. A cheap LED board might produce a deep burgundy or an orange-red that looks wrong through a factory red lens. The industry standard for automotive red is approximately 620-630 nanometers.
If your factory lens is heavily faded or yellowed, the light output will shift regardless of the LED wavelength. This is where lens restoration becomes a compliance issue, not just an aesthetic one.
Lens Restoration for Maximum Output
A dirty or oxidized lens can cut light output by 30-50 percent, negating the brightness advantage of your LED conversion. For glass lenses, a mild automotive polish with a foam pad removes surface oxidation without scratching. For plastic lenses, use a plastic-specific polishing compound and finish with a UV-resistant clear coat.
The Practical Compliance Checklist
Before you button up the installation, run through this checklist:
- Color check: With the brake applied, view the lamp from 10 feet. The light should be clearly red, not orange or pink.
- Brightness check: At night, stand 300 feet behind the vehicle and confirm the brake lamp is clearly visible without being blinding.
- Flash rate check: Count the flashes over 10 seconds. You should see 10 to 20 flashes (60-120 per minute).
- Reverse light check: Confirm the reverse lamps emit white light, not blue or yellow.
- Moisture check: After a rain or car wash, inspect the housing for condensation. A failed seal will destroy an LED board within weeks.
How to Choose the Right Kit for Your Vehicle
Start with your vehicle's exact year, make, and model. A direct-fit conversion kit is engineered for a specific housing assembly, so the circuit board lines up with the factory lens and mounting hardware. Universal LED bulbs are cheaper but often scatter light incorrectly.
Ask these questions before you buy:
- Does the kit include an electronic flasher relay, or will I need to buy one separately?
- Is the installation plug-and-play, or does it require custom fabrication and wiring?
- Does the kit retain my factory lens and chrome housing?
- What is the stated lumen output and current draw?
- Is there free technical support if I get stuck?
For a 12-volt conversion, the Society of Automotive Engineers lighting standards provide a useful baseline for expected performance. A kit that includes a wiring harness, mounting hardware, and clear instructions will save you hours of frustration. If you are not comfortable with basic wiring, look for a kit that connects directly to the factory harness with no splicing.
Conclusion: Modernize Your Classic Safely
Upgrading to LED tail lights is the best safety investment you can make for a classic vehicle. The faster illumination and higher brightness give drivers behind you more time to react, and the sequential turn signals make your intentions unmistakable. The key is choosing a kit that is direct-fit for your vehicle, includes the right flasher relay, and preserves the factory look.
At RMS Lighting LLC, we carry a full range of classic car LED tail light conversion kits that have been rigorously researched and tested for fitment and performance. Whether you need a RestoLights kit for your C10 or Regal or a premium Oracle system for your Fox Body Mustang, our expert team is here to help you find the perfect fit for your vehicle. Experience the difference that precision-engineered, high-standard lighting can make for your driving experience.
Frequently Asked Questions
Can I replace my classic car tail lights with LED bulbs?
Yes, you can. Two options exist: simple LED bulbs that drop into factory sockets, or complete conversion kits like the RestoLights series that replace the entire circuit board. Kits are the better choice for classics because they provide even light distribution across the lens and include the electronic flasher you need. Bulbs alone often create hotspots and trigger hyper-flash since they draw less current than incandescent bulbs.
Do I need a load resistor for LED tail light conversion kits?
Usually not. Complete kits, such as the C10 RestoLights or Digi-Tails panels, include an electronic flasher relay that replaces the factory unit. This solves the hyper-flash issue without the heat problems of load resistors. If you are only swapping bulbs, a load resistor or a 2-pin LED flasher relay like the speed-adjustable model from RMS Lighting is required to maintain proper flash rates.
Are LED tail light conversions street legal?
Yes, when the kit meets Federal Motor Vehicle Safety Standard (FMVSS) 108 requirements. Quality direct-fit kits are designed to comply because they maintain correct brightness, color, and beam patterns within your factory housing. Avoid universal strip lights or heavily smoked lenses, which can fail inspection. Kits that retain the original lens and housing, like the Oracle Lighting Fox Body kit, are the safest bet for legal compliance.
What are the benefits of sequential LED tail lights for vintage cars?
Sequential turn signals dramatically improve visibility by sweeping in the direction of your turn, which captures other drivers' attention faster than a standard blinking bulb. Beyond safety, they give your classic a modern, high-end look without altering the factory appearance. Kits like the RestoLights for the 1967-1972 C10 offer multiple flash patterns, letting you customize the effect to match your personal style.
How do I choose the right LED conversion kit for my specific vehicle model?
Start with a direct-fit kit built for your exact year, make, and model. A kit designed for a 1981-1988 Cutlass will not mount correctly in a Monte Carlo, even on the same G-body platform. Check the LED count and whether reverse lights are included. Confirm the kit includes an electronic flasher relay. If you are unsure, contact the manufacturer's technical support with your vehicle details before purchasing.
Upgrading your classic car's lighting should not require a degree in electrical engineering. The classic car restoration safety guidelines emphasize that proper lighting is critical for any vehicle driven on public roads. Choose a kit that is plug-and-play, includes the flasher relay, and is backed by a warranty. Your classic deserves lighting that performs as well as it looks.