



How Long Does Classic Car LED Conversion Take

Table of Contents
- How Long Does Classic Car LED Conversion Take
- LED Conversion Kits for Trucks and Classic Vehicles
- Automotive LED Installation Time by Component
- Tools Required for LED Conversion
- Vintage Car Electrical Upgrades and Compatibility
- Wiring Harness Installation and Aiming Adjustment
- Common Installation Mistakes and How to Avoid Them
- Reversibility and DOT Compliance Considerations
- Frequently Asked Questions
Last Updated: September 24, 2026
How Long Does Classic Car LED Conversion Take
The timeline for a classic car LED conversion depends on several factors: your experience level, the kit type you choose, and whether your vehicle's electrical system needs upgrades. Most plug-and-play headlight conversions take 1-3 hours for someone with basic automotive skills. More complex installations involving wiring harness modifications, flasher relay upgrades, and turn signal work can stretch to 4-8 hours.
The good news is that how long does classic car LED conversion take isn't a mystery, it's predictable once you understand what's involved. This guide breaks down the timeline by component, explains what tools you'll need, and covers the electrical compatibility issues that most DIY guides skip over.
LED Conversion Kits for Trucks and Classic Vehicles
LED conversion kits for trucks and classic vehicles come in two main flavors: plug-and-play and custom wiring solutions. Understanding the difference saves you hours of frustration.
Plug-and-play kits are designed to drop into your existing headlight housing with minimal modification. They connect directly to your factory wiring harness. These typically take 45 minutes to 1.5 hours per headlight. You're essentially swapping the bulb and maybe adjusting a connector.
Custom wiring solutions require more hands-on work. You're integrating a complete conversion kit that may involve new mounting hardware, custom connectors, and voltage management. These installations usually run 3-5 hours total because you're doing real electrical work, not just a swap.
The catch? Plug-and-play sounds easier, but it only works if your classic car's headlight housing is compatible with the LED bulb design. Older vehicles often have reflector housings that weren't engineered for LED beam patterns. That's where compatibility issues emerge.
Plug-and-Play Kits vs. Custom Wiring Solutions
Plug-and-play kits win on speed. No cutting wires, no soldering, no guessing about polarity. You unbox the kit, disconnect the old bulb connector, plug in the new one, and you're done with the headlights themselves. Time investment: under 2 hours for both headlights.
Custom wiring solutions take longer but give you more control over beam pattern, thermal management, and electrical load. You're building a proper integration between your LED bulbs and the vintage electrical system. This approach handles voltage drop better and prevents the hyper-flash problem that plagues cheap conversions on older cars.
The real difference comes down to your vehicle's age and electrical condition. A 1970s truck with original wiring might need the custom approach. A 1990s classic with a relatively modern electrical system can often handle plug-and-play.
Automotive LED Installation Time by Component
Breaking down the timeline by component gives you a realistic picture of where your hours go. Not every classic car needs every upgrade.
Headlight Housing Conversion Timeline
Headlight conversion is the main event. Start with removal: 20-30 minutes per side. You're disconnecting the wiring harness, unbolting the assembly, and carefully extracting it from the vehicle's front end. Older vehicles sometimes have corroded bolts or seized clips. Budget extra time if you're dealing with rust.
Once the housing is out, the actual LED bulb installation takes 10-15 minutes. You're removing the old halogen bulb, installing the LED bulb or conversion kit, and testing the connection before reassembly. Reinstallation takes another 15-20 minutes per side.
Total headlight work: 50 minutes to 1.5 hours per headlight, or 1.5-3 hours for both. If your vehicle has sealed beam headlights (common on pre-1980s cars), add 30 minutes because you're dealing with a more complex assembly.
The beam pattern adjustment happens after installation. This isn't optional, misaligned headlights blind oncoming drivers and defeat the purpose of upgrading. Aiming takes 15-20 minutes per light using a proper headlight aimer or a wall-mounted test setup.
Turn Signal and Taillight Assembly Installation
Turn signals are faster but trickier electrically. Removal typically takes 10-15 minutes per side. You're unbolting the lens assembly and disconnecting the wiring harness.
The LED bulb swap itself takes 5 minutes. But here's where time gets added: if your classic car's electrical system causes hyper-flash (rapid blinking instead of normal flash rate), you need a flasher relay upgrade. That's another 30-45 minutes of wiring work.
Taillight work follows the same pattern. Budget 20-30 minutes per side for physical installation. If you're upgrading both turn signals and taillights with LEDs, the flasher relay becomes essential, one relay handles both.
Total turn signal and taillight work: 45 minutes to 2 hours, depending on whether you need the relay upgrade.
2-Pin Speed Adjustable LED Flasher Turn →
Tools Required for LED Conversion
You don't need specialized equipment, but having the right tools prevents damage and saves time.
Essential tools:
- Socket set and wrenches (for headlight and taillight assembly bolts)
- Screwdrivers (Phillips and flathead, many classic cars use Phillips for trim clips)
- Panel removal tools (plastic pry tools prevent damage to trim and lens bezels)
- Flashlight or headlamp (working inside the engine bay requires good visibility)
- Multimeter (for checking voltage and polarity before connecting anything)
- Wire strippers and crimpers (if you're doing custom wiring)
Nice to have:
- Headlight aiming tool (makes beam pattern adjustment precise)
- Torque wrench (prevents over-tightening bolts on older plastic housings)
- Heat gun (helps remove stubborn adhesive on sealed assemblies)
Most DIY mechanics already own the essential tools. If you don't have a multimeter, buy one, it costs under 15 dollars and prevents expensive mistakes with vintage electrical systems.
Vintage Car Electrical Upgrades and Compatibility
This is where most online guides fall short. Your classic car's electrical system wasn't designed for LEDs. Understanding the compatibility issues saves you from dashboard error codes, hyper-flash, and premature LED failure.
Flasher Relay and Voltage Regulator Compatibility
Flasher relays are the unsung heroes of LED conversions on classic cars. Here's why they matter: LED bulbs draw less current than halogen bulbs. Your vehicle's original flasher relay was calibrated for halogen draw. When it sees the lower LED current, it thinks the bulb is burned out and flashes rapidly, hyper-flash.
The fix is a dedicated LED flasher relay. RMS Lighting LLC offers the 2-Pin Speed Adjustable LED Flasher Turn Signal Relay at 8 dollars, which handles this exact problem. Installation takes 20-30 minutes: locate your original flasher under the dash, unplug it, plug in the new one, and test.

Voltage regulators matter on older vehicles with charging systems that run hot. Classic cars often have voltage fluctuations between 13V and 15V. LEDs are sensitive to overvoltage. If your car's alternator runs consistently above 14.5V, a voltage regulator stabilizes the supply and extends LED life. This is a 30-minute installation if you're comfortable with basic wiring.
Grounding Issues and Electrical Load Management
Grounding problems are the hidden killer of LED conversions on vintage vehicles. Corroded grounds, loose connections, and poor contact points create voltage drop. Your LED bulbs don't get clean 12V power, they get 10V or 11V, which dims them and causes flickering.
Before you install anything, check the grounding path from your battery to the headlight assembly. Look for corrosion, loose bolts, or damaged wire insulation. A clean ground connection takes 10 minutes and prevents hours of troubleshooting later.
Electrical load is less critical with LEDs than with halogen, but it still matters on older vehicles. LEDs draw 20-30% of the current that halogen bulbs draw.
Wiring Harness Installation and Aiming Adjustment
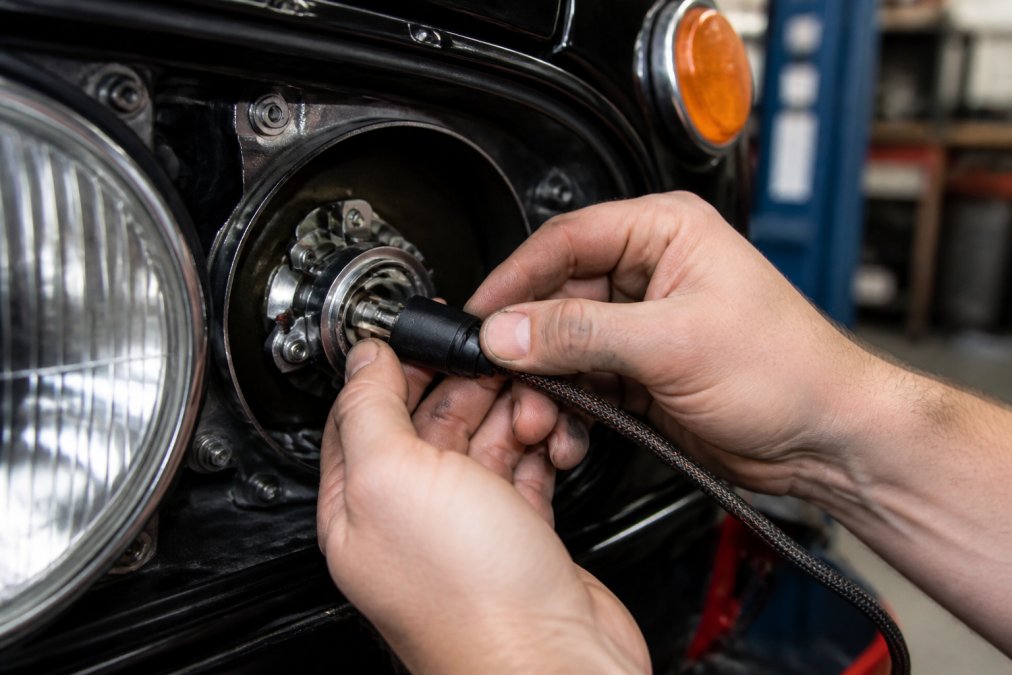
The wiring harness is the bridge between your classic car's electrical system and your new LED bulbs. Installation quality here determines whether your conversion lasts five years or five months.
Common Installation Mistakes and How to Avoid Them
Most LED conversion failures come from five repeated mistakes. Knowing them prevents wasted time and damaged components.
Reversibility and DOT Compliance Considerations
LED conversions on classic cars exist in a gray area legally. Some jurisdictions allow them under certain conditions. Others restrict them. Understanding the rules before you install saves you from fines or failed inspections.
Frequently Asked Questions
How long does it actually take to install an LED conversion kit on a classic car?
Installation time ranges from 2 to 6 hours depending on your kit type and experience level. Plug-and-play kits for headlights typically take 2-3 hours per side, while full wiring harness conversions may require 4-6 hours. Vintage electrical systems sometimes need additional time for flasher relay installation and grounding adjustments. Start with a realistic timeframe and work methodically through each connection to avoid mistakes that extend the project.
What tools do I need for a classic car LED conversion?
Basic tools include a socket set, screwdrivers (Phillips and flat-head), wire strippers, crimpers, a multimeter for testing voltage and polarity, and potentially a heat gun for connector removal. Headlight aiming tools or a DIY alignment method are essential to ensure proper beam pattern and cutoff line after installation. Keep a flashlight handy for working inside the headlight housing. If your kit includes a flasher relay, you may need a flat-head screwdriver to adjust the relay speed settings.
Will LED conversion kits cause hyper-flash or dashboard error codes on my vintage electrical system?
Hyper-flash occurs when LED bulbs draw less current than factory halogens, confusing the original flasher relay. Installing a compatible LED flasher relay eliminates this problem. RMS Lighting offers 2-pin flasher relays specifically designed to work with LED bulbs and prevent hyper-flash. Grounding issues and voltage drop from poor connections can trigger error codes, so ensure all connections are clean and secure. Test your system with a multimeter before final installation to catch polarity or voltage problems early.
Are LED conversion kits really worth the time and effort for a classic car?
Yes, LED conversions significantly improve nighttime visibility and reliability while maintaining an original appearance when you choose conversion kits designed for your headlight housing. The upfront time investment (2-6 hours) pays off through years of better visibility, longer bulb life, and reduced maintenance. Many classic car owners find the improved safety and modern performance justify the DIY installation effort.