



How to Check Headlight Bulb Size for Your Vehicle

Table of Contents
- Why Getting the Right Headlight Bulb Size Matters
- Check Your Owner's Manual First
- Inspect the Existing Bulb Markings
- Use an Online Bulb Lookup Tool
- Your Headlight Bulb Fitment Guide: Reading Base Types and Common Sizes
- The Difference Between H11 and 9005 Bulbs
- How to Replace Headlight Bulbs Safely
- Troubleshooting Incorrect Fitment and Aftermarket Compatibility
- Frequently Asked Questions
Last Updated: September 27, 2026
Why Getting the Right Headlight Bulb Size Matters
Knowing how to check headlight bulb size for vehicle applications prevents wasted money and dangerous nighttime driving. A mismatched bulb can rattle loose, throw light into oncoming traffic, or simply refuse to seat in the housing.
Getting the size right delivers three things:
- Correct beam pattern so light lands on the road, not in other drivers' eyes
- A secure socket fit that survives potholes and vibration
- Full electrical compatibility with your vehicle's existing wiring
Check Your Owner's Manual First
The fastest answer usually sits in your glovebox. Your owner's manual lists the exact bulb type for every lighting position on the car, including low beam, high beam, fog light, and turn signal.
Write down two things:
- The bulb type code for each position you plan to replace
- The wattage and voltage the factory system expects
Inspect the Existing Bulb Markings
Pulling the old bulb is the most reliable method, because you're reading the actual part number stamped on the component in your car.
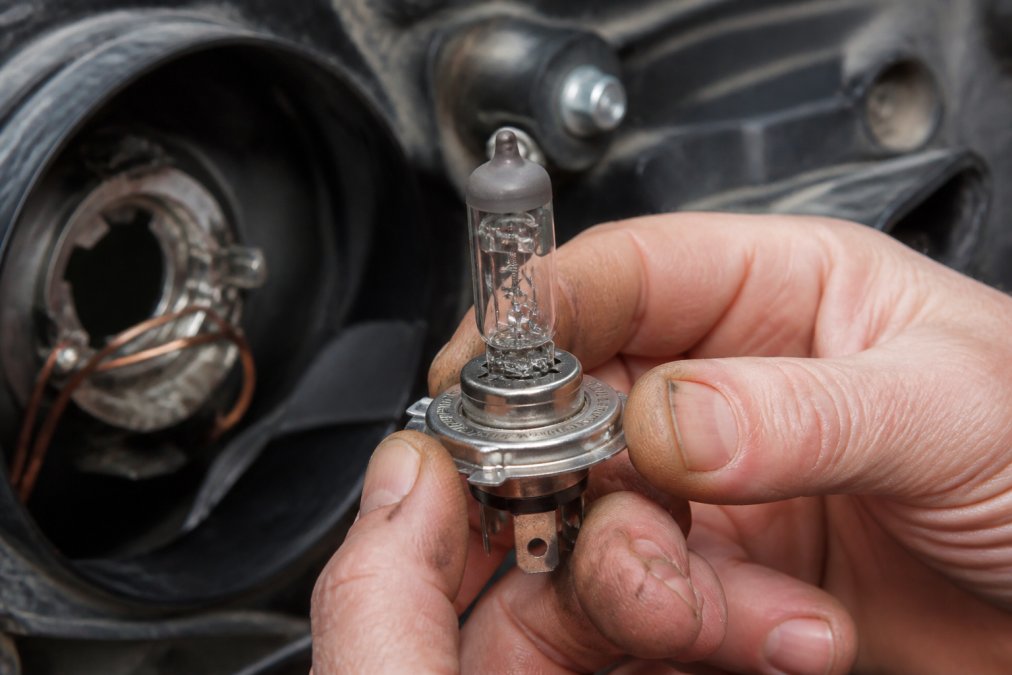
Here's the process:
- Park on level ground and turn the engine off.
- Open the hood and locate the back of the headlight assembly.
- Twist or unclip the dust cover to reach the socket.
- Disconnect the connector, then release the retaining clip.
- Pull the bulb straight out and read the markings on the metal base.
Use an Online Bulb Lookup Tool
Online lookup tools match your vehicle's year, make, model, and trim level against a bulb database. They're convenient, and for late-model cars they're usually accurate.
You'll need four pieces of information:
| Input | Where to Find It |
|---|---|
| Model year | Registration or door jamb sticker |
| Make and model | Vehicle badge or registration |
| Trim level | Door jamb sticker or VIN decode |
| Lighting position | Low beam, high beam, fog, turn signal |
Your Headlight Bulb Fitment Guide: Reading Base Types and Common Sizes
A headlight bulb fitment guide comes down to two things: the base type and the size code. The base is the metal or plastic footing that locks into the socket. The size code is the shorthand name for that base shape. Two bulbs can share the same glass envelope and still refuse to seat because the base tabs sit in different positions.
Most vehicles on the road use one of these:
- H11, very common low beam on sedans and crossovers; plastic base, single filament
- 9005 (HB3), common high beam, also used as a low beam on some trucks; squared connector
- 9006 (HB4), older low beam standard, still widespread; right-angle connector
- H4, combined low and high beam in one bulb with a three-prong plug
- H7, popular in European-designed housings; often needs a separate bulb holder
- H13, combined low and high beam, common on trucks and SUVs
- H1, single-filament bulb used in some fog lights and high beams
- 9012, increasingly common low beam on newer crossovers and sedans
How to Identify a Base Without a Part Number
When the stamp is worn or unreadable, you can still narrow the base down by measuring and counting. Grab a ruler or calipers and check three things:
- Locking tab count and position. H11 has one wide tab offset from center. 9005 and 9006 each have two tabs, but the tab widths differ and the 9006 tabs sit at a different clock position. H7 has no locking tabs at all, it relies on a wire retainer or plastic holder.
- Connector shape. H11 and H9 use a rounded, keyed plug. 9005 and 9006 use a squared plug with a locking latch. H4 and H13 use a rectangular multi-pin plug because they carry two filaments.
- Base diameter. H7 and H11 bases are close in diameter but not identical; a caliper reading of the metal collar will separate them when the tabs are ambiguous.
Why the Code Alone Is Not Enough
The socket, retaining clip, and dust cover are all shaped around the base geometry, not just the code. Two bulbs can carry similar-looking numbers and still use different tab layouts, 9005 and 9006 are the classic example. A bulb with the wrong base simply won't seat, no matter how close the numbers look.
The Difference Between H11 and 9005 Bulbs
The difference between H11 and 9005 bulbs comes down to the base lock tabs and the connector shape. They look similar at a glance, which is exactly why people mix them up.
How to Replace Headlight Bulbs Safely
Replacing a headlight bulb takes about 15 minutes per side on most vehicles. The steps are simple, but the safety details matter more than people expect.
RMSH4M2S - 60W 10K Lumens LED Bulb's →
What you'll need:
- Replacement bulbs in the correct size
- Nitrile gloves or a clean cloth
- A flashlight or headlamp
- A trim tool if the housing has plastic covers
The steps:
- Turn everything off. Key out, lights off, and let the bulb cool for at least ten minutes.
- Disconnect the battery if the housing sits near exposed wiring.
- Remove the dust cover behind the assembly.
- Unplug the connector by pressing its release tab, never by pulling the wires.
- Release the retaining clip and lift the old bulb out.
- Handle the new bulb with gloves. Skin oils on a halogen glass envelope create hot spots that shorten bulb life.
- Seat the new bulb so its tabs align with the socket notches.
- Reconnect, reseat the dust cover, and test before closing the hood.
Troubleshooting Incorrect Fitment and Aftermarket Compatibility
Aftermarket LED and HID conversion kits fail for more reasons than a wrong base code. Physical fit is only the first gate. The second is optical, whether the new light source sits at the same focal point as the halogen bulb the housing was designed around. The third is electrical, whether the vehicle's computer is happy with the new load.
Step 1: Confirm Physical Fit
Work through this checklist before you return anything:
- Confirm the base code matches your original bulb exactly
- Check whether your housing needs a bulb holder or adapter (common on H7 applications)
- Verify the connector clicks fully into place
- Look for a dust cover that won't close over a deeper bulb body
- Confirm the retaining clip seats without bending
- Check clearance behind the housing for the LED heatsink or fan
Some housings, especially on older vehicles, use a plastic retainer that a larger LED body won't clear. That's a fitment issue, not a defective product. Extended dust covers and low-profile retainers exist for exactly this problem, but they have to be matched to the housing.
Step 2: Check the Beam Pattern, Not Just the Fit
A bulb can lock in perfectly and still be wrong. Halogen housings are designed around a filament at a specific position. LED and HID chips sit at a different depth and emit light from a different shape, so the reflector or projector can't focus them the same way.
Signs the beam pattern is off:
- A dark spot or hot spot on the road ahead
- Light spraying above the cutoff line into oncoming traffic
- A wide, unfocused wash instead of a defined low-beam pattern
- Uneven output between the left and right sides after installing matching bulbs
Step 3: Resolve Electrical and Computer Issues
If your vehicle throws dashboard error codes, triggers a bulb-out warning, or hyper-flashes after an LED swap, the issue is usually electrical resistance, not physical fit. LEDs draw far less current than halogens, and some vehicle computers interpret the low draw as a failed bulb.
Common fixes:
- A CANbus-ready kit with built-in resistors
- Inline load resistors wired into the harness
- A dealer or shop recalibration of the body control module on vehicles that support it
Step 4: Know When to Stop
Some combinations simply shouldn't be forced. If the housing is a sealed reflector design with no projector, a high-output LED kit will scatter light no matter how well it fits. If the dust cover can't be sealed, moisture will kill the bulb and fog the lens. If the retainer bends, the bulb will vibrate loose.
Frequently Asked Questions
Do I need H11 or 9005 bulbs for my vehicle?
It depends on your vehicle's specific trim level and model year. H11 bulbs typically serve low beam applications, while 9005 bulbs are often used for high beams, but this varies by manufacturer. Check your owner's manual or the markings on your existing bulb to confirm. If your manual lists both, verify which position you're replacing. When in doubt, pull the old bulb and read the stamped part number directly from the base.
Can I check my headlight bulb size by looking at the old bulb?
Yes. Every headlight bulb has its size stamped or printed on the metal base or plastic connector. Common markings include H11, 9005, H4, H7, and H13. Remove the bulb from the housing and look for these characters. If the marking is worn or illegible, take a photo with your phone and zoom in, or bring the bulb to a parts store for identification.
Are headlight bulb sizes universal across all vehicle makes and models?
No. Bulb sizes vary widely by manufacturer, model year, and even trim level. A 2015 Honda Civic might use different bulbs than a 2015 Toyota Corolla. Some vehicles use the same bulb for both low and high beam, while others use separate sizes. Always verify fitment for your specific vehicle rather than assuming a bulb that fits one car will fit another.
What should I do if my owner's manual doesn't list the bulb size?
If your manual omits bulb specifications, remove the existing bulb and read its markings directly. Alternatively, use an online bulb lookup tool that filters by year, make, model, and trim. You can also call a dealership parts department with your VIN, or visit a local auto parts store where staff can match the bulb visually. Never guess, as incorrect bulbs can cause poor beam patterns or electrical issues.