



How to Prevent LED Headlight Overheating Issues

Table of Contents
- Why LED Headlights Overheat: Causes and Consequences
- Active vs Passive LED Cooling: Which System Fits Your Build
- Signs of LED Headlight Overheating You Should Never Ignore
- LED Headlight Installation Best Practices That Prevent Heat Buildup
- Dust Covers, Enclosed Housings, and Airflow: What Most Guides Get Wrong
- Troubleshooting Relays, Wiring, and Electrical Heat Sources
- DIY Thermal Testing and Environmental Factors
- Conclusion
- Frequently Asked Questions
Last Updated: October 1, 2026
Why LED Headlights Overheat: Causes and Consequences
An LED headlight is a semiconductor light source that converts electrical current into light, and like any electronic device, it produces waste heat. Preventing LED headlight overheating starts with knowing where that heat comes from.
Heat Sources Inside an LED Headlight Assembly
Most heat comes from the back of the bulb, not the light itself. The LED driver generates steady heat whenever the lights are on, and in a sealed housing that buildup has nowhere to escape.
Lumen Degradation and Reduced Bulb Lifespan
Heat is the number one killer of LED output. A bulb rated for 50,000 hours can lose much of its brightness in a fraction of that time, and the color can shift from crisp white to dull yellow.
Active vs Passive LED Cooling: Which System Fits Your Build
The choice between active and passive cooling comes down to how much heat your setup needs to shed. Passive systems rely on a heat sink and natural airflow; active systems add a fan. Neither is automatically better, it depends on your housing, driving habits, and available room.
Fanless Aluminum Heat Sink Designs
Fanless designs use a metal body to pull heat away from the LED chips. Aluminum is most common because it moves heat well and stays light. The RMSH3LED60W uses a 6063 aviation-grade aluminum body to dissipate heat without a fan, no moving parts, less to break.

Active Cooling Fans and Built-In Drivers
Active cooling adds a small fan to the base of the bulb to pull hot air away from the heat sink. Bulbs like the RMSH1M2S pair a built-in driver with an active cooling fan for long drives. The trade-off is one more moving part that can wear out.

| Cooling Type | How It Works | Best For | Watch Out For |
|---|---|---|---|
| Passive (fanless) | Aluminum heat sink, natural airflow | Sealed housings, low-dust areas | Needs open space around the base |
| Active (fan) | Fan pushes air across the heat sink | Long drives, high-output bulbs | Fan can clog with dust |
Signs of LED Headlight Overheating You Should Never Ignore
Flickering is the most common early warning sign of LED headlight overheating, often appearing before the bulb fails completely. Other signs: dimming after the lights have been on a while, a color shift toward yellow or blue, and a burning smell near the housing. A bulb that shuts off and comes back on after cooling is hitting thermal shutdown.
LED Headlight Installation Best Practices That Prevent Heat Buildup
Proper installation is the single biggest factor in how long your LEDs last. Most overheating problems trace back to how the bulb sits in the housing, not the bulb itself.
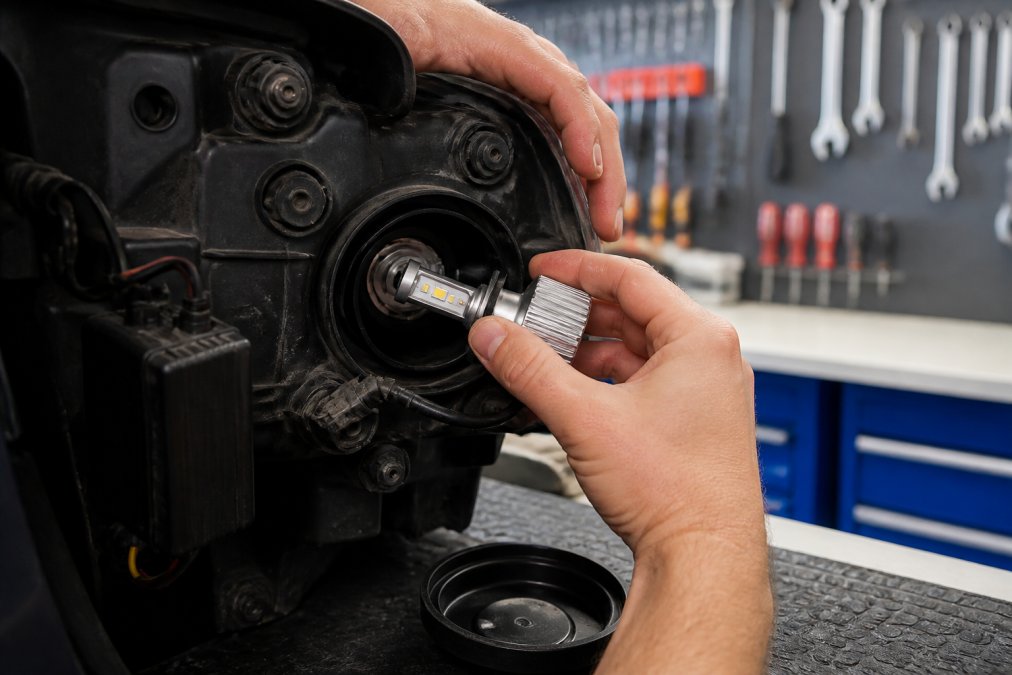
Step-by-Step Installation Checklist
- Confirm the correct bulb type for your vehicle before ordering
- Disconnect the battery before touching any wiring
- Remove the old bulb and inspect the housing for debris
- Check that the heat sink or fan has clear space around it
- Seat the bulb firmly so the base contacts the housing
- Reconnect the wiring harness and test the lights
- Run the lights for 10 minutes and check for excess heat
The Dust Cover Decision: The Step Most Guides Skip
The dust cover is where most installations go wrong. It keeps water, dust, and road grit out of the housing, but it also seals air in, creating a heat trap right at the base of the bulb where the LED driver and heat sink sit.
- Vented dust cover. Best for fanless aluminum heat sinks, keeps debris out while small vents let hot air escape.
- Extended or deep dust cover. Best for active-cooling bulbs, tall enough that the fan can pull in cool air and push hot air out. A fan pressed against a flat cover just recirculates hot air.
- No cover. Acceptable only when the housing is already sealed from the engine bay and the manufacturer specifies it. In dusty or wet environments, it trades a heat problem for a contamination problem.
Vehicle-Specific Installation Notes
The right installation depends on what you drive.
- Compact cars and sedans. Tight engine bays and small, fully sealed housings limit airflow, so a vented dust cover or short fanless heat sink usually fits better than a long active-cooling bulb pressed against the housing wall.
- Trucks and SUVs. Larger housings and open engine bays allow active-cooling bulbs, but the base still needs clearance. On lifted trucks with aftermarket housings, check the heat sink isn't resting against the housing shell.
- Motorcycles. Single-headlight setups run the bulb harder with no second bulb sharing the load, and housings are small with minimal low-speed airflow. Fanless designs with a large surface area survive better than fans that clog with road dust.
Common Installation Mistakes That Cause Overheating
- Jamming a solid cover over a fan. The fan spins but moves the same hot air, so temperature climbs instead of dropping.
- Leaving the heat sink braided sleeve compressed. A flexible heat sink folded or zip-tied against itself cannot shed heat.
- Seating the bulb crooked. A bulb that doesn't sit flush leaves a gap at the base, reducing contact with the housing and trapping heat.
- Reusing a corroded connector. Resistance at the connector adds heat unrelated to the LED. Clean or replace it before installing the new bulb.
Before you close everything up, run the lights for 10 minutes with the cover off, then again with the cover on. If the housing feels noticeably hotter with the cover on, your cover is trapping heat and needs to be swapped for a vented or extended version.
Installation is not just about seating the bulb. It is about deciding how air moves once the housing is closed. Match the dust cover to the cooling type, give the heat sink or fan clearance, and check the housing temperature before you call the job done.
Dust Covers, Enclosed Housings, and Airflow: What Most Guides Get Wrong
Enclosed housings trap heat, and that's the core problem most guides skip. A dust cover protects the bulb from water and debris, but a solid cover also seals in hot air. The fix is to match the cover to the cooling system.
Match your dust cover to your cooling type. Vented covers work with fanless heat sinks. Active-cooling bulbs need open or vented space so the fan can actually move air.
Troubleshooting Relays, Wiring, and Electrical Heat Sources
Not all heat comes from the LED itself. A weak relay or corroded harness adds resistance, and resistance turns electricity into heat. If one bulb runs hotter than the other, check that side's wiring first, corrosion at relay contacts, loose grounds, worn connectors.
DIY Thermal Testing and Environmental Factors
Most guides say to "check for excess heat" without explaining how. An infrared thermometer turns a vague worry into a number you can act on, the fastest way to find out whether your setup is fine or quietly cooking itself.
How to Measure Your LED Headlight Temperature Safely
You need a basic infrared thermometer (cooking or HVAC models read the right range) and a shaded spot to park. Don't touch the bulb or housing during the test.
- Start cold. Let the vehicle sit at least an hour so the housing is at ambient temperature.
- Run the lights. Low beams on for 20 minutes, without idling the engine more than normal driving would.
- Measure three points per side. (a) the back of the bulb base where the driver sits, (b) the heat sink or fan housing, (c) the outside of the housing near the bulb. Record all three.
- Compare left to right. A gap over about 15-20°F points to a wiring, airflow, or seating problem on the hotter side, not a bad bulb.
- Re-test after a drive. Repeat after a normal 20-minute drive in traffic. Stop-and-go is the worst case for airflow, so this number matters more than the parked one.
What the Numbers Mean
There's no universal cutoff, every housing and bulb differs, but a few patterns hold:
- Warm but not painful. Normal range; most LED drivers are designed to run warm.
- Too hot to hold for more than a second. The cooling setup is marginal. Check for a blocked heat sink, a solid dust cover, or a stopped fan.
- A large left-to-right gap. One side is working harder. Check the connector, the ground, and whether the heat sink is pressed against the housing.
- Temperature climbs steadily and never levels off. Heat is going in faster than it can leave, the pattern that leads to lumen degradation and thermal shutdown.
Environmental Factors That Change the Math
Ambient temperature and driving conditions shift the safe operating window.
- Hot climates and desert heat. With outside air near triple digits, the housing has less temperature difference to work with, so heat leaves more slowly. A setup fine in mild weather can hit thermal shutdown in slow summer traffic. Give more cooling margin, vented cover, larger heat sink, or active fan, if you drive in extreme heat.
- Cold climates. Cold air helps the LED run cooler but brings brittle plastic housings, condensation inside the lens, and fans that stiffen or stall. A fanless design avoids fan-stall entirely in deep cold.
- Stop-and-go traffic. Airflow across the housing drops to almost nothing when you're not moving, the most common condition where a marginal setup fails.
- Tight engine bays and covered pods. Small, fully enclosed pods trap heat regardless of outside temperature. These benefit most from a fanless heat sink with a vented cover, since there's no reliable airflow for a fan.
- Motorcycles at low speed. A single headlight with limited airflow at idle runs hotter than the same bulb in a car at highway speed. Fanless designs with a large surface area are more predictable here.
Log your measurements. Write down the ambient temperature, the three readings per side, and the driving conditions. After a few weeks you will know your setup's normal range, and any drift upward is an early warning that something, a clogged fan, a loose connector, a cracked cover, needs attention.
You do not need a shop to know if your LEDs are running too hot. A $20 infrared thermometer, a 20-minute run, and a left-to-right comparison will tell you more than any generic "check for heat" advice. Combine that with an honest look at your climate and driving pattern, and you can size your cooling setup to your actual conditions instead of guessing.
Conclusion
Heat is the quiet enemy of every LED upgrade, and it doesn't announce itself until the damage is done. The fix comes down to three things: the right cooling design for your housing, a clean installation with proper airflow, and a dust cover that matches your setup. Get those right, and your LEDs will stay bright for years.
Frequently Asked Questions
Why are my LED headlights overheating?
LED headlights overheat when heat can't escape the housing. Common causes include blocked cooling fans, missing or modified dust covers that trap air, undersized heat sinks, and high-wattage bulbs in small reflectors. Enclosed housings and high ambient temperatures make it worse. If the LED driver or bulb base feels too hot to touch after a short drive, airflow is likely restricted. Checking installation clearance and confirming your bulb's cooling design matches your housing type solves most cases.
Do LED car headlights get hot?
Yes. LEDs produce light more efficiently than halogens, but they still generate heat at the back of the bulb, mainly from the driver and LED chips. That heat must move away from the emitter through a heat sink or fan. If it can't, junction temperature rises, output drops, and lifespan shortens. Fanless designs rely on aluminum bodies to dissipate heat, while active designs use a fan to push air across the heat sink. Both need clearance to work.
How do I know if my LED headlight bulb is overheating?
Watch for flickering, dimming, color shift toward blue or purple, or one bulb shutting off after 10-15 minutes and returning after it cools. These are classic signs of thermal shutdown or lumen degradation. A bulb that works cold but fails warm points to heat, not wiring. If the heat sink or fan area is too hot to touch, or you smell hot plastic, stop using it and check installation clearance and dust cover fit before replacing the bulb.
Does improper installation cause LED headlight failure?
Often, yes. A bulb seated at the wrong depth, a dust cover that seals the housing completely, or a fan pressed against a reflector wall all block heat transfer. Corroded relay contacts and undersized wiring add electrical resistance, which creates extra heat. Following installation best practices, including verifying fitment, leaving space around the heat sink, and checking voltage at the connector, prevents most heat-related failures.