



LED Bulb Dust Cap Clearance: Install Safely

Table of Contents
- Why LED Bulbs Require More Clearance Than Halogen
- How to Measure Your Headlight Housing for LED Dust Cap Clearance
- Headlight Housing Moisture Prevention and Seal Integrity
- Types of Aftermarket Dust Covers and Extension Caps
- Step-by-Step Installation of Extended Rubber Headlight Dust Cover Extensions
- How to Fix Hyperflashing Turn Signals After LED Conversion
- Troubleshooting Fitment Issues and Common Installation Mistakes
- Conclusion
Last Updated: August 23, 2026
Why LED Bulbs Require More Clearance Than Halogen
LED bulbs generate heat differently than halogen bulbs. Halogen dissipates heat in all directions from a filament, while LED bulbs concentrate heat at a heatsink, a finned metal structure at the base. This concentrated thermal profile means the heatsink extends 15-25mm beyond a halogen bulb's base, occupying significantly more physical space inside your headlight housing.
When you install an aftermarket LED bulb into an OEM headlight designed for halogen, the heatsink often sits too close to the housing back, restricting airflow and preventing proper thermal dissipation. Without adequate clearance, the LED bulb throttles itself or shuts down entirely to protect its internal circuitry.
A standard OEM dust cover, designed for a compact halogen base, won't leave enough space for the LED heatsink to breathe. The result is condensation buildup, overheating, and premature bulb failure.
How to Measure Your Headlight Housing for LED Dust Cap Clearance
Before buying any extended dust cover, measure exactly how much space you're working with inside your headlight housing. This 15-minute process prevents costly mistakes.
Tools You'll Need
- Digital caliper (precision to 0.5mm ideal)
- Flashlight for visibility
- Ruler or measuring tape
- Notebook to record measurements
Measuring the Installation Depth
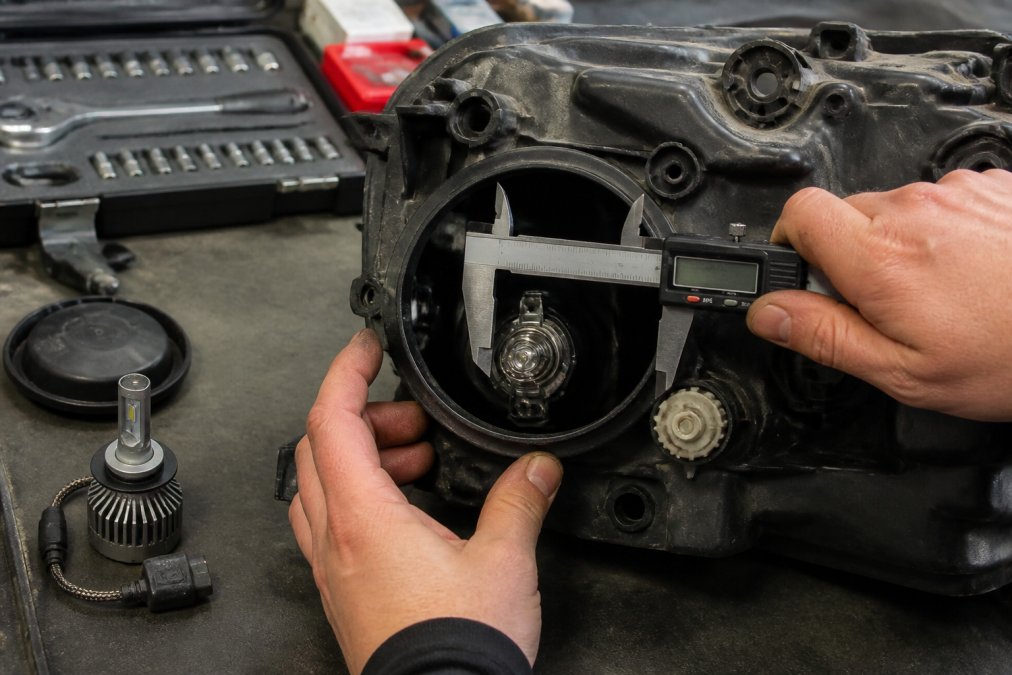
Remove the OEM dust cover and illuminate the interior with your flashlight. Use the caliper to measure from the inner back wall to where the dust cover seats, typically a slight lip or groove inside the housing. Record this installation depth.
Next, measure the OEM dust cover thickness, most factory covers are 8-12mm. Subtract the cover thickness from your installation depth. The remaining space is what you have for the LED heatsink.
Example: if your installation depth is 35mm and your OEM cover is 10mm thick, you have 25mm of usable space. A standard LED heatsink is often 20-22mm, leaving only 3-5mm of clearance. An extended dust cover that adds 8-10mm of depth eats into that already-tight space further, unless specifically designed for LED heatsink profiles.
Headlight Housing Moisture Prevention and Seal Integrity
Moisture inside a headlight assembly kills LED conversions. Water vapor enters through small gaps and condenses on the cool LED heatsink, corroding the circuit board and solder joints. Unlike halogen bulbs, which run hot enough to evaporate moisture, LED bulbs operate at 40-60°C on the heatsink surface compared to 200°C+ for halogen (peer-reviewed research). That temperature difference means condensation forms readily and persists.
The dust cover's primary job is keeping moisture out. A poorly sealed dust cover creates a pathway for humid air to enter the headlight assembly. Once inside, that air encounters the cool LED heatsink and condenses into liquid water.
How Condensation Buildup Damages LED Components
Condensation attacks the LED circuit board, solder joints, and heatsink base plate. Water on the circuit board causes corrosion of copper traces and component leads. Solder joints crack under thermal cycling, breaking electrical connections. The heatsink base plate corrodes, reducing thermal contact between the LED die and metal, trapping heat inside the bulb and forcing thermal shutdown.
Testing Your Waterproof Seal
After installation, run the headlights for 5-10 minutes, then turn them off and wait 2 hours in a cool environment. Check the inside of the headlight lens for condensation. A light haze is normal. Visible water droplets indicate a seal failure.
If you see condensation, remove the dust cover and inspect the gasket surface. Clean it with a dry cloth and check that the dust cover is seating evenly. If the gasket is permanently deformed, replace it. Many aftermarket dust covers come with fresh gaskets designed for LED applications.
Types of Aftermarket Dust Covers and Extension Caps
Not all aftermarket dust covers are created equal. Understanding the differences helps you choose the right cover for your retrofit.
Silicone vs. PVC Dust Caps
Silicone dust caps are flexible and compress slightly when installed, helping them seat against the gasket surface even if the housing has minor irregularities. Silicone tolerates temperature swings well, remaining flexible in cold and heat. Most modern aftermarket covers designed for LED retrofits use silicone. Lower-quality silicone can degrade under prolonged UV exposure.
PVC dust caps are rigid and provide a consistent seal if the gasket surface is perfectly flat. PVC resists UV degradation better than low-quality silicone but becomes brittle in cold climates and can crack if installed with too much force.
For LED retrofits in vehicles with seasonal temperature swings, silicone is generally better. Choose automotive-grade silicone, not generic rubber.
Custom 3D Printed Dust Cover Options
3D printing offers custom dust covers for unusual headlight housings. The advantage is precision fitment; the challenge is material durability. Most 3D printed covers use ABS or PETG plastic, which can warp under sustained heat. Use thermally stable resin like Polycarbonate or carbon-fiber-reinforced nylon. The most successful designs incorporate a silicone gasket insert molded into the printed part.
Step-by-Step Installation of Extended Rubber Headlight Dust Cover Extensions
Installing an extended dust cover is straightforward, but details matter. A careless installation compromises the seal.
Step 1: Remove the OEM Cover and Inspect the Housing
Turn off the vehicle and let the headlight cool completely. The OEM dust cover may be held by a twist-lock bayonet fitting, snap clip, or threaded ring. Check your service manual for the specific removal method. Once off, inspect the gasket surface inside the housing where the dust cover seats.
Look for debris, corrosion, or damage. If dirty, use a dry cloth to clean it. If you see white corrosion, gently clean it with a soft brush. Do not use water or solvents. If the OEM gasket is permanently compressed or damaged, replace it now.
Step 2: Clean and Prepare the Gasket Surface
Use a lint-free cloth to wipe the gasket surface one final time. Any dust or residue compromises the seal. Inspect the new extended dust cover's gasket. Never apply grease, oil, or silicone spray to the gasket; these degrade the seal and attract dust.
Step 3: Install the Extended Cap and Verify Fitment
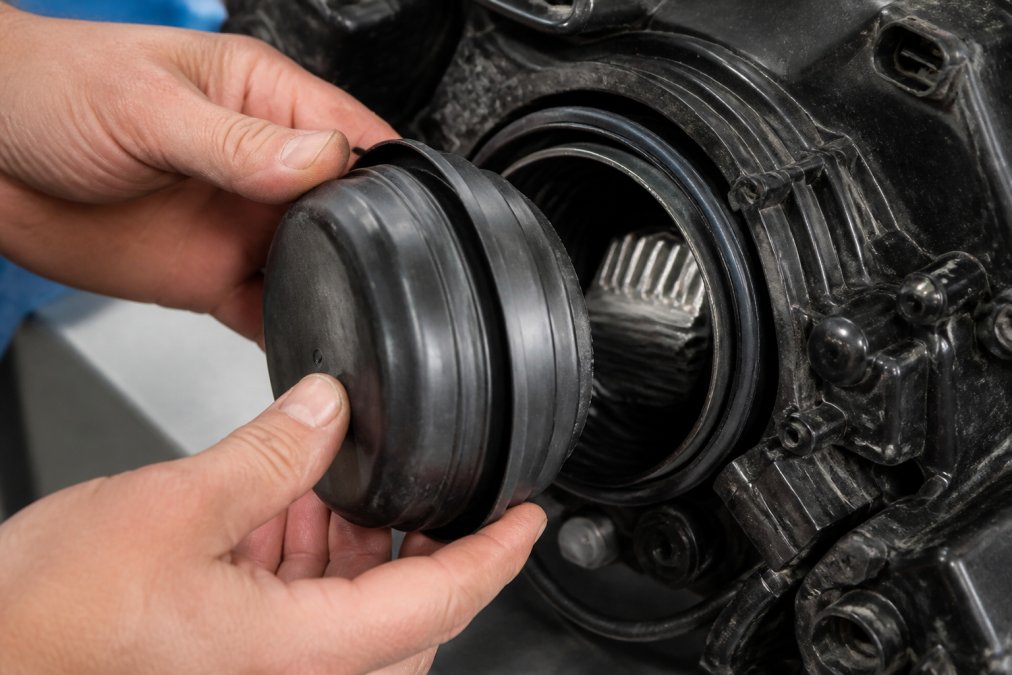
Insert the new extended dust cover into the housing, aligning it with the gasket surface. Push it in slowly and evenly. You should feel resistance as the gasket compresses and seats. If you feel sudden hard resistance before full seating, stop and check for misalignment.
Once seated, check that it's flush and level. The gasket should compress evenly all the way around. If one side is compressed more than the other, remove the cover, inspect for debris or damage, and try again. If your cover uses a bayonet lock or threaded ring, secure it snugly. Do not overtighten.
How to Fix Hyperflashing Turn Signals After LED Conversion
One of the most common issues after an LED headlight retrofit is hyperflashing turn signals. The dashboard indicator blinks rapidly instead of at the normal rate. This happens because LED bulbs draw significantly less current than halogen bulbs, and your vehicle's turn signal flasher module interprets the low current as a burnt-out bulb.
Why Hyperflashing Occurs with LED Bulbs
Your vehicle's turn signal system includes a thermal flasher module calibrated for a specific current draw, typically 10-15 amps for a standard halogen bulb (sae.org). An LED bulb draws only 1-3 amps. When the flasher sees this low current, it switches to a rapid blink pattern. This rapid switching creates voltage spikes that can damage sensitive electronics, and hyperflashing is not legal in most jurisdictions.
Solutions: Load Resistors and Flasher Module Upgrades
Load resistors mimic the current draw of a halogen bulb, tricking the flasher module into thinking the LED bulb is standard. They're installed in parallel with the LED bulb and dissipate 10-15 watts of power as heat without producing light. Load resistors are inexpensive and easy to install but waste energy as heat.
Flasher module upgrades replace the thermal flasher with an electronic flasher that automatically detects LED bulbs and adjusts operation accordingly. This is a more elegant solution but requires removing the old flasher and installing a new one, which may require accessing the fuse panel under the dashboard.
For most LED retrofits, load resistors are the practical choice. Install one resistor per turn signal circuit converted to LED. The resistor wires connect to the turn signal wiring harness by soldering or spade connectors.
Troubleshooting Fitment Issues and Common Installation Mistakes
Even with careful planning, fitment issues can arise. Here's how to diagnose and fix the most common problems.
Dust Cover Won't Seat Properly
If the extended dust cover won't seat fully or feels like it's binding, stop and don't force it. Remove the cover and inspect both the cover's sealing surface and the housing gasket surface for debris, corrosion, or damage. Clean both thoroughly with a dry cloth.
If the gasket is permanently compressed on one side, gently warm it with a heat gun (low setting, 10-15 seconds) and allow it to cool. If cracked or permanently deformed, replace it. Check that you're inserting the cover at the correct angle, some covers have alignment marks. If the cover still won't seat, measure the housing opening and cover base. A mismatch of more than 1-2mm indicates a compatibility issue. Contact the cover manufacturer or a reputable lighting specialist for a replacement.
LED Bulb Overheating Due to Restricted Airflow
If your LED bulb is shutting down intermittently or running very hot, the heatsink isn't getting enough airflow. Remove the dust cover and check the clearance between the LED heatsink and the housing wall. You should have at least 10mm of space. If less than 5mm, use a dust cover extension that provides more clearance or reposition the bulb if the housing allows it.
Some housings have internal baffles that restrict airflow. If you see obstructions, carefully remove or modify them only if you're comfortable working inside the headlight assembly.
Moisture Seeping Into the Headlight Assembly
Condensation inside the headlight is usually a gasket sealing problem. Remove the dust cover and inspect the gasket. If compressed unevenly, it won't seal properly. Check that the housing gasket surface is clean and flat. If it has raised edges or corrosion, use fine sandpaper to smooth it gently. Reinstall the cover and test for condensation again.
If condensation persists, the issue might be ventilation. Some headlight housings have small vent holes that allow moisture in during humid conditions. The best mitigation is to run the headlights periodically to warm the housing and evaporate moisture.
| Problem | Cause | Solution |
|---|---|---|
| Dust cover won't seat | Debris on gasket or misalignment | Clean gasket surface, verify alignment |
| LED bulb overheating | Insufficient clearance or restricted airflow | Use extended cover with more clearance |
| Condensation in housing | Poor gasket seal or compressed gasket | Replace gasket, ensure even compression |
| Hyperflashing turn signals | LED current draw too low for flasher | Install load resistor or upgrade flasher module |
LED bulb dust cap clearance separates a successful retrofit from a frustrating one. Get it right, and your LED conversion delivers improved visibility and reliability for years. Get it wrong, and you'll troubleshoot overheating, moisture damage, and electrical gremlins.
The key is measurement and planning before you buy anything. Spend 15 minutes understanding your headlight housing's dimensions, and you'll avoid 90% of fitment problems. RMS Lighting LLC offers extended dust covers and accessories specifically engineered for LED retrofits, each tested for thermal performance and seal integrity. When you're ready to upgrade, we can help you find the exact clearance solution your vehicle needs.
Frequently Asked Questions
Why do LED bulbs need more clearance than halogen bulbs?
LED bulbs generate heat through their heatsink, which extends deeper into the headlight housing than a traditional halogen filament. If your dust cap doesn't account for this extra depth, the heatsink can contact the cap, restricting airflow and causing thermal dissipation problems. Additionally, improper fitment can compromise the waterproof seal, allowing moisture ingress into the headlight assembly. This is why measuring your LED dust cap clearance before installation is critical to avoiding overheating and condensation buildup.
What are the risks of leaving the dust cap off after installing LED headlights?
Driving without a dust cover exposes your headlight assembly to moisture, dirt, and debris. Over time, condensation buildup inside the housing can damage LED components, corrode the wiring harness, and reduce light output. Additionally, without a proper seal, water ingress during rain or car washes can cause electrical shorts and premature bulb failure. A functioning dust cap maintains the integrity of your headlight housing and protects your LED investment from environmental damage.
How do I know if my LED bulb is overheating due to lack of airflow?
Signs of overheating include flickering or dimming lights, a burning smell near the headlight, or the bulb shutting off intermittently while driving. These symptoms often indicate that the heatsink isn't receiving adequate ventilation because the dust cover is too tight or positioned incorrectly. Check that your extended dust cap isn't compressing the heatsink fins. If airflow is restricted, thermal dissipation suffers, and the LED's lifespan shortens significantly. Verify that your dust cap clearance matches the bulb's heatsink dimensions exactly.
What's the difference between silicone and PVC dust caps for LED headlights?
Silicone caps offer superior flexibility and temperature resistance, maintaining their seal even as the headlight housing expands and contracts with heat cycles. PVC caps are more rigid and cost-effective but can become brittle in extreme cold and may crack over time. For LED applications where thermal management matters, silicone provides better gasket integrity and longer durability. PVC works for temporary solutions or applications with minimal temperature variation, but silicone is the preferred choice for reliable waterproof sealing in automotive lighting upgrades.
This article was written using GrandRanker