



Install LED Turn Signal Resistors Without Cutting Wires

Table of Contents
- Why LED Turn Signals Hyperflash and What Load Resistors Do
- Plug-and-Play LED Load Resistor Adapters: The No-Cut Solution
- Step-by-Step Installation Without Wire Cutting
- LED Turn Signal Hyperflash Fix: Using an LED-Compatible Flasher Relay
- LED-Compatible Flasher Relay vs. Load Resistor: Which One to Choose
- LED Load Resistor Mounting and Heat Safety
- Common Mistakes to Avoid
- Frequently Asked Questions
Last Updated: October 8, 2026
Why LED Turn Signals Hyperflash and What Load Resistors Do
Swap factory incandescent turn signal bulbs for LEDs and your signals may flash two or three times faster than normal. This is hyperflash, caused by a mismatch in electrical load.
Factory flasher relays are designed for power-hungry incandescent bulbs. LEDs draw far less current, so when the relay detects that drop in load, it assumes a bulb has burned out and speeds up the flash rate as a warning.
A load resistor simulates an incandescent bulb's electrical load, tricking the flasher relay into thinking the original bulb is still there. It absorbs excess power as heat, balancing the circuit so your signals flash at the correct speed.

Traditional load resistor installs meant cutting wires and soldering. Modern plug-and-play adapters eliminate that entirely.
Plug-and-Play LED Load Resistor Adapters: The No-Cut Solution
The simplest way to install LED turn signal resistors without cutting wires is a plug-and-play adapter. It fits between your factory socket and the new LED bulb, no soldering, stripping, or permanent modifications.
The adapter holds your LED bulb in the socket and includes an integrated resistor that balances the load. Remove the factory bulb, plug the adapter into the empty socket, insert the LED bulb, and you're done.
This approach works on most vehicles built in the last 20 years. The key is finding the right adapter for your specific turn signal connector type.
How Adapters Simulate Incandescent Bulb Load
Plug-and-play adapters contain a ceramic or wire-wound resistive element rated for the correct wattage. As current flows, it consumes power just like an incandescent filament, maintaining the load your flasher relay expects.
The resistor is sized to match the original bulb's wattage, typically 21 watts, so the flasher relay sees no change in load and maintains normal flash speed.
Modern adapters handle this heat safely: the resistive element is encased in heat-resistant material and positioned away from plastic components that could melt.
Identifying Your Vehicle's Connector Type
Before you buy an adapter, you need to know what type of connector your turn signal uses. The most common types are:
- 1156 base (single contact): One metal contact at the base. Used on many older vehicles and some modern trucks.
- 1157 base (dual contact): Two metal contacts at the base. Common on vehicles with combined turn signal and parking light functions.
- T10 wedge connector: A small wedge-shaped connector with two flat metal tabs. Found on some modern vehicles.
- Bayonet mount (BA15s): A threaded base with two contact points. Less common but still found on some classic and European vehicles.
The easiest way to identify your connector is to remove the factory bulb and compare its base to product photos online; most retailers list connector types clearly.
If unsure, check your owner's manual or ask a local parts store for the correct connector type for your year, make, and model.
Step-by-Step Installation Without Wire Cutting
Installing a plug-and-play LED load resistor adapter takes about 10 minutes per turn signal. Here's exactly how to do it safely.
What You'll Need
- Plug-and-play LED load resistor adapter (correct type for your vehicle)
- LED turn signal bulb (compatible with your adapter)
- Screwdrivers (Phillips and flat-head, depending on your vehicle)
- Work gloves (optional, but helpful for protecting your hands)
- Flashlight or headlamp
- Your vehicle's owner's manual (for reference)
Step 1: Disconnect the Battery
Before working on any vehicle electrical system, disconnect the negative battery terminal to prevent short circuits and protect you and your components.
Locate the battery under the hood, loosen the nut on the negative (black) terminal with a wrench, slide the connector off the post, and wait at least 30 seconds to clear residual charge.
Step 2: Locate and Remove the Factory Turn Signal Bulb
Turn signal bulbs are typically accessed from the wheel well or behind the turn signal housing; check your owner's manual for the exact location.
Front signals may require removing a wheel well liner; rear signals are often reached from inside the trunk or through the rear bumper. Some vehicles use quick-release holders that twist counterclockwise.
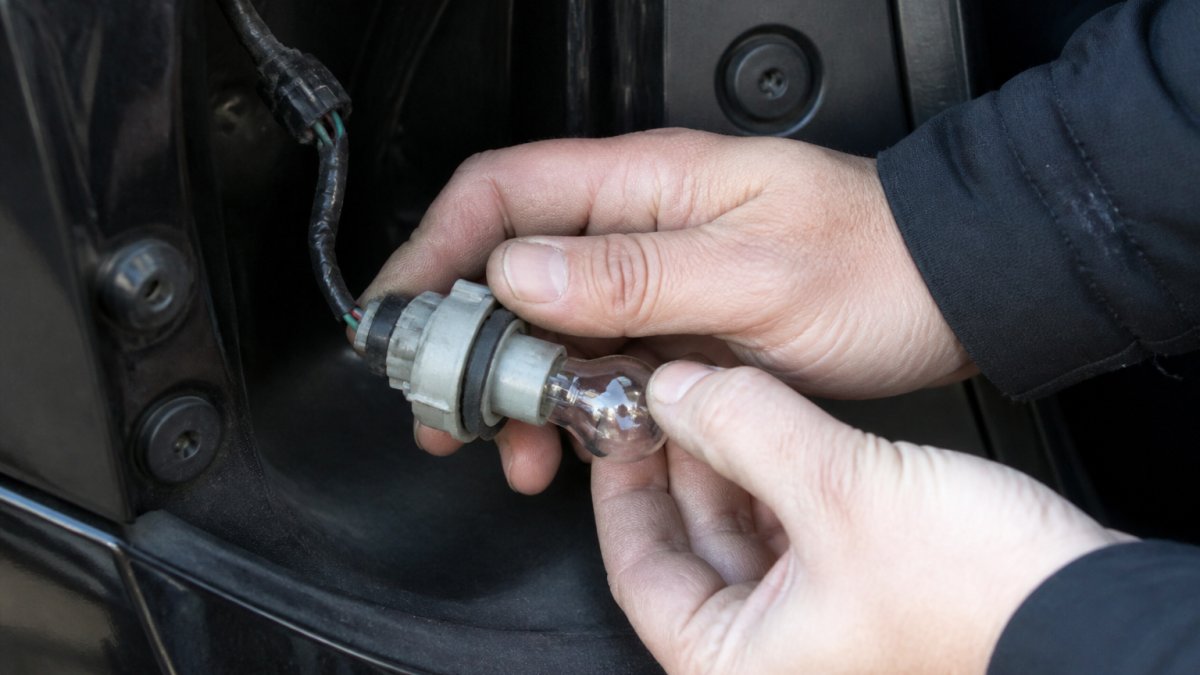
Grasp the bulb holder and twist it counterclockwise (or pull straight out, depending on design). The bulb comes free; set it aside.
Step 3: Install the Adapter and LED Bulb
Insert the adapter into the empty socket and push gently until it seats fully; you should hear or feel a slight click as it locks.
Insert the LED bulb into the adapter; it should slide in smoothly. If not, stop and verify you have the correct adapter type.
Once seated, installation is complete, no wires, solder, or cuts.
Step 4: Test the Flash Rate
Before reassembling, reconnect the battery, turn the key to "On" without starting the engine, and activate your turn signal. It should blink at a normal rate, roughly once per second.
If it's still too fast, the adapter may not be making good contact. Remove it, inspect the adapter connector and socket for dirt or corrosion, and reinstall firmly.
If normal, turn off the vehicle and reassemble any trim pieces or liners you removed.
LED Turn Signal Hyperflash Fix: Using an LED-Compatible Flasher Relay
If you want to avoid resistors entirely, an LED-compatible flasher relay is another option.
EP27 LED Flasher Relay – Hyper Flash Fix →
An LED-compatible flasher relay doesn't need a specific load; it detects LED current draw directly and maintains normal flash speed with either bulb type.
The RMS Lighting LLC EP27 LED Flasher Relay is designed for vehicles that use an EP27-style flasher. It eliminates hyperflash without requiring external load resistors, making it ideal for a completely clean installation.
To install one, locate the factory flasher (usually under the dashboard or in the fuse box), remove it, and plug in the new relay, under five minutes, no tools.
The trade-off: you must know your vehicle's flasher type, since connectors vary, so verify compatibility before buying. The advantage is a permanent solution that works with any LED bulb, regardless of wattage.
LED-Compatible Flasher Relay vs. Load Resistor: Which One to Choose
Both solutions fix hyperflash effectively. The choice depends on your vehicle, your budget, and how many turn signals you're upgrading.
| Factor | Load Resistor Adapter | LED-Compatible Flasher Relay |
|---|---|---|
| Installation | Plug-and-play per bulb | Single relay replacement |
| Cost per signal | Lower | Higher upfront |
| Reversibility | Completely reversible | Completely reversible |
| Wiring required | None | None |
| Best for | Single or dual signals | All four corners |
| Compatibility | Varies by connector type | Varies by flasher type |
Load resistor adapters suit front-signal-only upgrades or common connector types. They're cheaper per signal and need no electrical system knowledge.
LED-compatible flasher relays suit all-four-corner upgrades or a single solution for any LED bulb. The RMS Lighting LLC 2-Pin Speed Adjustable LED Flasher offers speed adjustment to fine-tune your flash rate.

LED Load Resistor Mounting and Heat Safety
Load resistors generate heat. This is not a flaw, it's how they work. But improper mounting can cause problems.
Preventing Resistor Overheating
A 21-watt resistor dissipates that power as heat. In a confined space with poor airflow, temperatures can climb and, in extreme cases, damage nearby wiring or plastic.
The key is airflow. Mount your resistor in a location where air can circulate around it. Avoid mounting it directly against plastic, rubber, or foam insulation.
If you're using a plug-and-play adapter, overheating is rarely an issue because the resistor is integrated into the adapter housing and designed for safe operation. If you're using a standalone resistor mounted separately, follow these guidelines:
- Mount the resistor at least two inches away from any plastic components
- Ensure the mounting location has natural airflow (wheel wells are ideal)
- Use a heat-resistant adhesive or bracket if mounting to metal
- Never wrap the resistor in insulation or cover it with tape
Safe Mounting Locations
The best mounting locations for standalone resistors are:
- Wheel wells: Excellent airflow. Protected from water spray. Easy to access.
- Behind bumpers: Good ventilation. Out of sight. Accessible for maintenance.
- Engine bay (away from heat sources): Well-ventilated. Keep at least six inches from the radiator or exhaust manifold.
- Under the vehicle (if weatherproofed): Not recommended unless the resistor is in a sealed, waterproof enclosure.
Avoid mounting resistors inside door panels, under carpeting, or in any location where airflow is restricted.
If you're using the RMS Lighting LLC 2-Pin Hyper Flash Flasher with Ground Wire, the relay itself generates minimal heat and can be mounted in the fuse box or under the dashboard without concern.

Common Mistakes to Avoid
Using the wrong adapter type: The most frequent mistake is buying an adapter for the wrong connector.
Skipping the battery disconnect: Working on vehicle electrical systems without disconnecting the battery can cause short circuits.
Ignoring poor electrical contact: If your flash rate is still too fast after installation, the problem is usually poor contact between the adapter and the socket.
Installing resistors in confined spaces: Heat buildup is the only real risk with resistors. If you're mounting a standalone resistor, choose a location with good airflow. Wheel wells are ideal.
Mixing LED and incandescent bulbs: If you upgrade only your front turn signals to LED but leave the rear signals as incandescent, your flasher relay receives a mixed load.
Forgetting to test after installation: Always activate your turn signal after installing an adapter or relay. A quick visual check confirms that your flash rate is normal and your installation is complete.
Installing LED turn signal resistors without cutting wires is straightforward with modern plug-and-play adapters. Whether you choose a load resistor adapter or an LED-compatible flasher relay, both solutions eliminate hyperflash. Get started with RMS Lighting LLC and explore our full range of LED turn signal solutions, including our EP27 LED Flasher Relay and compatible LED bulbs engineered for reliable performance.
Frequently Asked Questions
Can you install LED turn signal resistors without cutting wires?
Yes. Plug-and-play LED load resistor adapters let you upgrade to LED turn signals without cutting or splicing any factory wiring. The adapter installs between the factory socket and your LED bulb, simulating the electrical load of an incandescent bulb. Simply remove the factory bulb, insert the adapter, install your LED bulb, and reconnect. This reversible method preserves your vehicle's original wiring and takes under 10 minutes per corner.
What causes LED turn signals to hyperflash, and how does a load resistor fix it?
LED bulbs draw far less electrical current than incandescent bulbs. Your vehicle's factory flasher relay interprets this lower load as a burned-out bulb and speeds up the flash rate (hyperflash). A load resistor balances the electrical load by drawing power equal to an incandescent bulb, tricking the flasher into operating at the correct speed. Plug-and-play adapters contain integrated resistors, eliminating the need for external wiring or heat management concerns.
Is a load resistor or an LED-compatible flasher relay the better choice?
It depends on your vehicle and preference. An LED-compatible flasher relay (like the RMS Lighting EP27) replaces your factory relay entirely and works with LED bulbs without needing resistors, ideal if your vehicle uses an EP27-style flasher and you want a single solution. Load resistor adapters are best if you want a reversible, no-cut installation that preserves your factory relay. For most DIY installations, plug-and-play adapters offer a straightforward approach.
Where should LED turn signal load resistors be mounted, and do they get hot?
Resistor adapters install directly in the factory bulb socket, no separate mounting needed. External load resistors (if used) mount near the turn signal housing, away from fuel lines and plastics. Yes, resistors generate heat as they dissipate power. Always verify your adapter is rated for the wattage of your LED bulbs and avoid enclosed spaces that trap heat.