


Prevent Hyperflash With Aftermarket Bulbs: 5 Methods

Table of Contents
- What Causes Hyperflash When You Install Aftermarket LED Bulbs
- Method 1: Replace Your Flasher With an LED-Compatible Flasher Relay
- Method 2: Install Load Resistors to Simulate Incandescent Bulb Load
- Method 3: Use CanBus-Compatible LED Bulbs With Built-In Load Balancing
- Method 4: Troubleshooting Hyperflash When Your Fix Doesn't Work
- Method 5: Address Hazard Light and Front/Rear Circuit Behavior
- Best Methods for Preventing Hyperflash: Quick Comparison
- Frequently Asked Questions
Last Updated: October 21, 2026
What Causes Hyperflash When You Install Aftermarket LED Bulbs
Hyperflash happens because your vehicle's electrical system can't tell the difference between a dead bulb and a working LED. Installing aftermarket LED bulbs triggers a detection system never designed for them, making it essential to prevent hyperflash aftermarket bulbs through proper solutions.
Your turn-signal circuit monitors electrical load. The factory flasher relay expects a certain power draw from incandescent bulbs, but LEDs draw far less. The system interprets this lower draw as a burned-out bulb and speeds up the flash rate.

How Your Vehicle Detects a Failed Turn-Signal Bulb
Your turn-signal circuit uses a flasher relay to create the blinking effect. It measures current through your bulbs; when current drops below a threshold, it assumes a bulb has failed and increases the flash rate.
The threshold is calibrated for incandescent bulbs, which draw significant power. A typical incandescent 1157 bulb pulls around 25 watts. LED replacements pull 5-10 watts. That 60-75% drop in power consumption triggers the bulb-out detection system every single time.
Why LED Bulbs Trigger the Hyperflash Problem
LED aftermarket bulbs are far more efficient than incandescent ones, producing the same light output while consuming a fraction of the power. That efficiency breaks the assumptions your factory flasher relay makes.
The flasher relay only knows current draw. When it sees the drop, it flashes faster. This happens with nearly every LED turn-signal conversion unless you address the electrical load mismatch.
Some newer vehicles have CanBus systems that can detect LED bulbs directly and adjust the flasher behavior automatically. Older vehicles almost never have this capability.
Method 1: Replace Your Flasher With an LED-Compatible Flasher Relay
The simplest fix is swapping your factory flasher relay for one designed to work with LEDs. It requires no wiring modifications and works with any LED bulb.
An LED-compatible flasher relay doesn't rely on current draw to detect bulb failure, so your vehicle accepts the new bulbs without misinterpreting them as failures.
How LED-Compatible Flasher Relays Work
LED-compatible flasher relays use electronic circuits that monitor voltage patterns rather than current draw alone, detecting actual bulb failures while ignoring the normal low-power behavior of LEDs.
The relay installs in the same location and plugs into the same connector as your factory flasher, sending power at the normal flash rate and recognizing LEDs as valid instead of triggering the rapid-flash warning.
Different vehicles use different flasher styles. The most common types are the 2-pin relay and the EP27 relay. You need to know which type your vehicle uses before ordering a replacement.
Installation Steps for a Flasher Relay Upgrade
Replacing a flasher relay takes 5-10 minutes and no special tools.
Step 1: Locate Your Factory Flasher Relay
Step 2: Remove the Old Flasher
Grasp the flasher firmly and pull it straight out of its socket; some require a slight twist first.
Step 3: Install the New LED-Compatible Flasher
Insert the new flasher into the same socket and push it straight in until it seats fully.
Step 4: Test Your Turn Signals
Turn on your ignition and activate the left turn signal.
Step 5: Test Your Hazard Lights
Many vehicles use the same flasher for hazard lights.
If hyperflash persists after installation, you may have installed an incompatible flasher type.
RMS Lighting offers several LED-compatible flasher options designed for common vehicle types. The EP27 LED Flasher Relay is built for vehicles using EP27-style flashers and eliminates hyperflash without requiring external load resistors. The 2-Pin Speed Adjustable LED Flasher works with most vehicles that use 2-pin flashers and lets you fine-tune the flash rate with a simple adjustment.

Method 2: Install Load Resistors to Simulate Incandescent Bulb Load
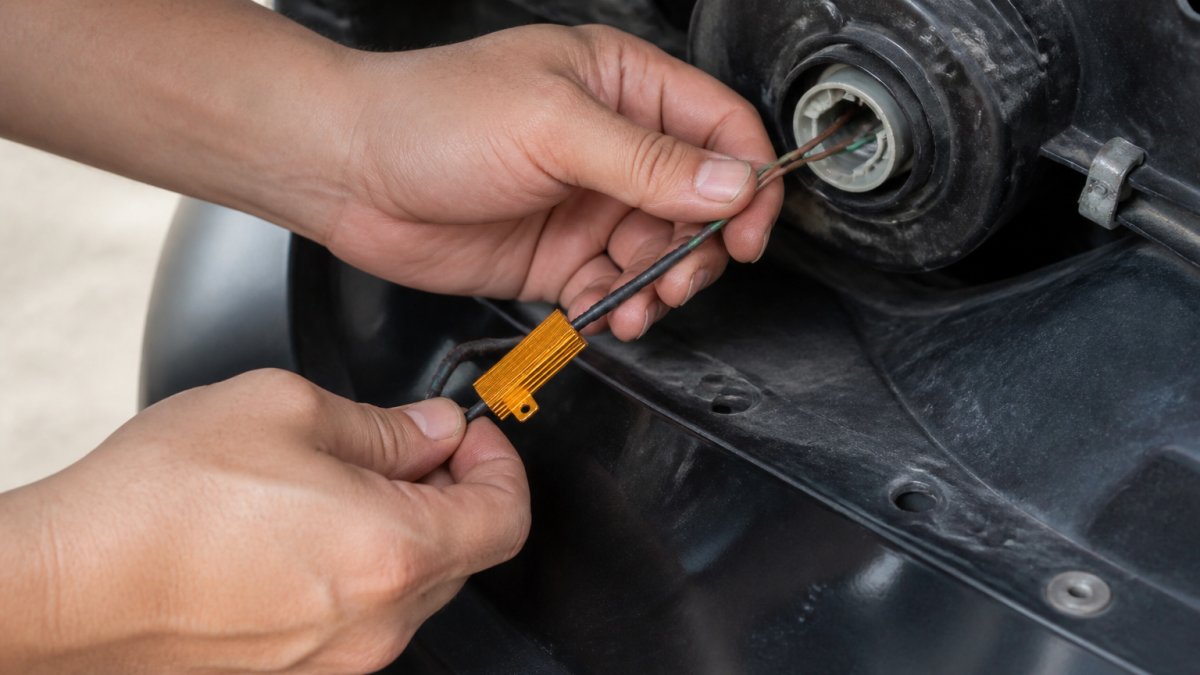
Load resistors trick your factory flasher relay into thinking your LED bulbs draw full power. A resistor wired in parallel with each LED bulb dissipates energy as heat, and the relay sees the combined current draw as normal.
How Load Resistors Prevent Hyperflash
A load resistor converts electrical energy into heat. Wired in parallel with an LED bulb, it adds back the power draw the LED removed.
Your factory flasher relay checks total current through the circuit. With a properly sized parallel resistor, total current approaches what the relay expects from an incandescent bulb, so it flashes at normal speed.
The resistor doesn't produce light, it simply dissipates power, which is why it gets hot whenever your turn signals are on.
Choosing the Right Resistor Value for Your Vehicle and Bulb
Resistor values are measured in ohms. The correct value depends on your vehicle's voltage (usually 12 volts) and the wattage of the LED bulb.
The formula is: Resistance (ohms) = Voltage² ÷ Power (watts)
For a 12-volt system and a 25-watt load target: 144 ÷ 25 = 5.76 ohms
In practice, you'll use the nearest standard resistor value. Common choices are 6 ohms, 10 ohms, or 25 ohms depending on your specific bulb and vehicle.
If you're unsure about resistor sizing, check your LED bulb's specifications or wiring diagram; many sellers provide resistor recommendations with their products.
Wiring Load Resistors in Parallel With Your Turn-Signal Bulbs
Step 1: Disconnect the Battery
EP27 LED Flasher Relay – Hyper Flash Fix →
Always disconnect your vehicle's negative battery terminal before working on electrical systems to prevent accidental shorts.
Step 2: Access the Turn-Signal Bulb Socket
Locate the turn-signal light housing you want to modify.
Step 3: Identify the Bulb Wires
The turn-signal bulb socket has two wires: power and ground.
Step 4: Prepare the Resistor Leads
Resistors have two leads.
Step 5: Connect the Resistor in Parallel
Solder one resistor lead to the power wire of the bulb socket and the other to the ground wire.
Step 6: Secure and Test
If hyperflash persists, your resistor value may be incorrect. Verify the ohm rating and power rating match your bulb specifications.
Method 3: Use CanBus-Compatible LED Bulbs With Built-In Load Balancing
Some LED bulbs include internal circuitry that simulates incandescent load without external resistors. These CanBus-compatible bulbs are the easiest solution for vehicles with CanBus electrical systems.
RMS Lighting offers CanBus-compatible switchback bulbs in multiple sizes. The 1157 Switchback CanBus LED Bulbs illuminate white for parking lights and switch to flashing amber for turn signals. The 3157 Switchback CanBus LED Bulbs and 7443 Switchback CanBus LED Bulbs cover other common bulb types.

CanBus bulbs work best on vehicles with CanBus electrical systems. Older vehicles without CanBus may still experience hyperflash even with CanBus bulbs. Check your vehicle's year, make, and model to confirm CanBus compatibility before ordering.
Method 4: Troubleshooting Hyperflash When Your Fix Doesn't Work
Sometimes hyperflash persists after you've installed a fix. This usually means the fix is incompatible with your vehicle, the installation is incorrect, or you have a different electrical problem.
Diagnosing Whether the Bulb or Flasher Is the Problem
Start by testing your turn signals with the factory incandescent bulbs reinstalled. If hyperflash disappears, the problem is the LED-to-incandescent mismatch. If it continues with factory bulbs, you have an underlying electrical issue unrelated to your LED upgrade, a faulty flasher relay, corroded wiring, or a failing bulb, and your vehicle needs professional diagnosis.
Test one turn signal at a time. Activate just the left turn signal. If it flashes normally, move to the right. If only one side hyperflashes, the problem is localized to that circuit.
Common Installation Mistakes That Keep Hyperflash Happening
The most common mistake is installing a flasher relay designed for a different vehicle type. A 2-pin relay won't work in a vehicle that uses an EP27 flasher, so verify your flasher type before ordering.
Loose connections are another culprit. If your resistor or flasher isn't seated fully, it won't work properly. Reseat all connections and verify they're tight.
Some vehicles have separate flashers for turn signals and hazard lights. You may need to replace both flashers to fix hyperflash completely.
Method 5: Address Hazard Light and Front/Rear Circuit Behavior
Hazard lights use the same flasher relay as turn signals on most vehicles.
Test your hazard lights independently. Activate them without activating turn signals. If they hyperflash while turn signals work normally, your hazard circuit needs a separate fix.
You may need to install a second flasher relay specifically for hazards. Or you might need additional load resistors on the hazard light circuit.
Front and rear turn signals sometimes behave differently. Your vehicle might have separate flashers for front and rear, or they might share one flasher.
Best Methods for Preventing Hyperflash: Quick Comparison
| Method | Cost | Installation Time | Best For | Drawbacks |
|---|---|---|---|---|
| LED-Compatible Flasher Relay | $8-$18 | 5-10 minutes | All vehicles | Requires correct flasher type |
| Load Resistors | $15-$30 | 30-60 minutes | Budget builds | Generates heat, needs secure mounting |
| CanBus LED Bulbs | $20-$55 | 10-15 minutes | Modern vehicles | Works only on CanBus systems |
The flasher relay method is the fastest and cleanest. You swap one component and you're done.
Load resistors cost less but require more installation work. They generate heat and need careful mounting. This method works on any vehicle regardless of age or electrical system type.
CanBus bulbs offer the best user experience if your vehicle supports them. They eliminate hyperflash, look great, and require minimal installation.
For classic cars and older trucks, the flasher relay or load resistor methods are your best options. Most older vehicles lack CanBus systems entirely.
Hyperflash is frustrating, but it's solvable.
At RMS Lighting LLC, we've helped countless enthusiasts upgrade their turn signals and eliminate hyperflash. Our LED-compatible flasher relays and CanBus switchback bulbs are engineered to solve this exact problem.
Frequently Asked Questions
Do LED turn signals always cause hyperflash?
Not always. Hyperflash depends on your vehicle's flasher relay and electrical circuit design. Some newer vehicles with CanBus systems handle LED bulbs without issue. Older vehicles with mechanical flashers are more prone to hyperflash because they rely on electrical load to time the flash rate. A simple test: install one LED bulb and activate the turn signal. If it flashes rapidly (more than 2 times per second), your vehicle will need either an LED-compatible flasher relay or load resistors to prevent hyperflash.
What's the difference between using an LED-compatible flasher relay and load resistors?
An LED-compatible flasher relay replaces your factory relay and recognizes LED bulbs automatically, eliminating hyperflash without extra wiring. Load resistors work by simulating the electrical load of an incandescent bulb, tricking your factory flasher into normal operation. Flasher relays are simpler to install (plug-and-play) but require your vehicle to use a compatible relay type. Load resistors work on most vehicles but require inline wiring and generate heat during use. For a 2-pin flasher system, the RMS Lighting 2-Pin LED Flasher Relay ($8.00) is often the easiest solution.
Can I use CanBus LED bulbs to prevent hyperflash on any vehicle?
CanBus bulbs are designed to communicate with your vehicle's body control module to prevent error codes and hyperflash, but they work best on vehicles with CanBus electrical systems. Older vehicles without CanBus architecture may still experience hyperflash even with CanBus-compatible bulbs. RMS Lighting's switchback bulbs (1157, 3157, and 7443 models at $55.00 per pair) include CanBus technology, but the product documentation notes that some vehicles may still need an LED flasher relay for complete hyperflash prevention.
How do I know if my vehicle needs a flasher relay or load resistors?
First, identify your flasher relay type by checking your owner's manual or looking under the dashboard near the steering column. Common types include EP27, 2-pin, and 3-pin relays. If your vehicle uses an EP27-style relay, the RMS Lighting EP27 LED Flasher Relay ($17.99) is a direct replacement. For 2-pin systems, the RMS Lighting 2-Pin LED Flasher ($8.00-$10.00) works well. If you're unsure of your relay type or prefer not to replace the relay, load resistors are a universal backup option that work with almost any vehicle, though they require more installation work.