



Why LED Headlights Fail Early: Common Causes

Table of Contents
- Why LED Headlights Fail Early: The Main Culprits
- Heat Dissipation and Thermal Management
- Electrical System Interference and Voltage Fluctuations
- Installation Errors and Reversed Polarity
- LED Headlight Flickering Causes and Diagnostics
- Best High Performance LED Headlight Bulbs and Compatibility
- How to Install LED Headlight Conversion Kits Correctly
- Conclusion
Last Updated: August 22, 2026
Why LED Headlights Fail Early: The Main Culprits
LED headlights promise brighter, more efficient lighting than halogen bulbs, yet many fail prematurely. At RMS Lighting LLC, we've analyzed thousands of failures and found that LEDs don't fail because the technology is flawed, they fail due to installation, power delivery, and maintenance issues. Most failures stem from five core issues: inadequate thermal management, electrical system incompatibility, installation errors, voltage instability, and environmental degradation.
Heat Dissipation and Thermal Management
LED headlights concentrate heat at the diode junction, and that heat must escape or the bulb dies. Unlike halogen bulbs, which dissipate heat broadly, LEDs concentrate thermal output in a small semiconductor. The heat sink pulls that heat away, but if it doesn't make solid contact with the bulb housing or airflow is blocked, temperature climbs rapidly.
Many aftermarket LEDs use passive heat sinks relying entirely on ambient airflow. In stop-and-go traffic or when parked with headlights on, airflow drops to near zero and the diode temperature spikes, causing failure within 500 to 2,000 hours, far shorter than rated lifespan.
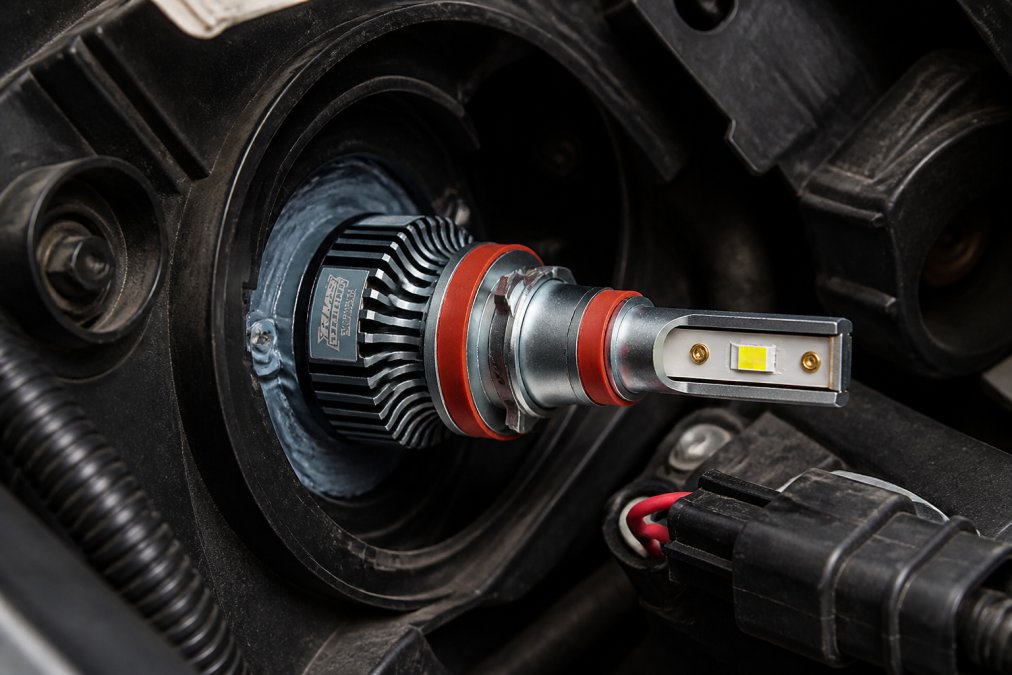
Premium LED bulbs incorporate active cooling fans that run whenever headlights are on, forcing air through the heat sink and keeping diode junction temperature below 85°C. The RMSH11B Non-CanBus 60W LED and RMSH4M2S 60W LED both feature built-in cooling fans that maintain optimal operating temperature during extended use.

Temperature cycling also degrades LEDs. Rapid heating and cooling from night driving followed by daytime parking causes solder joints to crack and semiconductor materials to degrade. Quality LEDs are rated for -40°C to +85°C, but repeated thermal cycling significantly shortens actual lifespan (peer-reviewed research).
Electrical System Interference and Voltage Fluctuations
Your vehicle's electrical system is hostile to LEDs. The alternator charges the battery at approximately 13.5 to 14.5 volts under normal driving, but voltage spikes can exceed 16 volts briefly (sae.org). LEDs are rated for 12-volt operation with tight tolerances, and sustained overvoltage dramatically shortens lifespan.
Older vehicles with aftermarket electrical modifications are especially prone to voltage instability. A worn alternator regulator, corroded battery terminals, or undersized wiring can cause voltage to fluctuate between 11 and 16 volts. Each spike stresses the LED driver module, the circuit that converts vehicle voltage to precise current the diodes need. Eventually, the driver fails.
CANbus systems in modern vehicles add complexity. When you install an LED bulb with high current draw in a vehicle expecting lower-load halogen, the CANbus interprets this as a fault, triggering error codes, flickering, or disabling headlights. Non-CANbus LED bulbs bypass this communication but won't work properly in CANbus vehicles. The RMSH11B is specifically designed as non-CANbus for older vehicles.
Pulse width modulation (PWM) used by some LED driver modules can radiate electromagnetic interference affecting other systems. Poor grounding and low-quality wiring harnesses make this worse.
Installation Errors and Reversed Polarity
How you install the LED bulb matters as much as the bulb itself. The most common error is reversed polarity, connecting positive and negative wires backward. LEDs are polarity-sensitive; reversed connections force current backward through the semiconductor, causing immediate thermal damage to the junction.
Many aftermarket LEDs require splicing into the factory headlight circuit. If the technician doesn't properly identify which wire is positive and negative, the bulb will fail within seconds to minutes. Even brief reverse-polarity events cause permanent damage.
Connector corrosion is another installation-related failure. Factory headlight connectors designed for halogen bulbs experience increased contact resistance with LEDs. Over time, corrosion builds up, increasing voltage drop and reducing voltage available to the LED driver. The driver compensates by increasing current, overheating the diode.
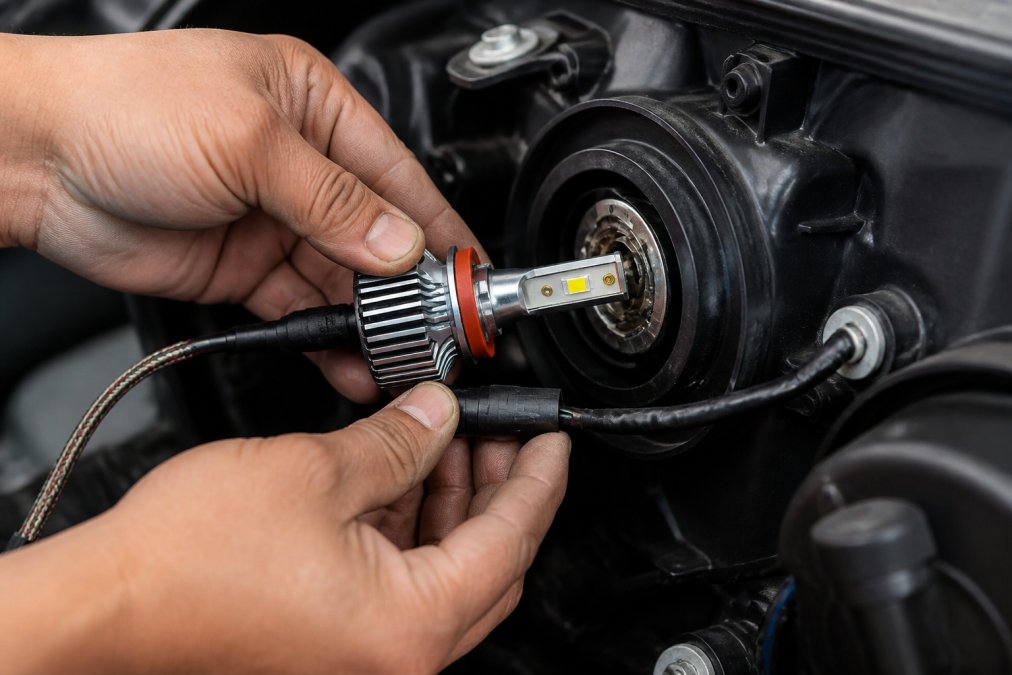
Improper heat sink contact is common when LED bulbs aren't seated fully in the headlight housing. Air gaps act as thermal insulators, causing diode temperature to climb and the bulb to fail prematurely. Always ensure the bulb is fully inserted and the housing is clean before installation.
Many DIY installers also fail to secure wiring harnesses properly. If harnesses vibrate against sharp edges or hot surfaces, insulation cracks, creating short circuits that destroy the LED driver. Use cable ties and heat shrink tubing to secure harnesses away from engine heat and moving parts.
LED Headlight Flickering Causes and Diagnostics
Flickering is one of the most common LED complaints. Understanding the cause is essential to fixing it.
Voltage fluctuation flickering occurs when the vehicle's electrical system supplies unstable voltage. The LED driver has a minimum voltage threshold; if voltage dips below it, LEDs turn off momentarily. When voltage recovers, they turn back on, creating visible flicker. Older vehicles with weak alternators or corroded battery terminals are prone to this.
CANbus incompatibility flickering happens when you install a non-CANbus LED in a CANbus vehicle. The vehicle's computer detects a load mismatch and sends a signal to reduce current. The LED driver receives conflicting signals and cycles on and off, often accompanied by dashboard error codes.
Driver module failure causes irregular flickering that worsens over time. As the driver ages, capacitors degrade, reducing its ability to smooth voltage fluctuations.
Loose connections create intermittent flickering. If the connector isn't fully seated, contact resistance increases, introducing voltage drops that trigger the LED driver's low-voltage shutdown.
To diagnose flickering, check battery voltage with a multimeter (should be 13.5 to 14.5 volts at idle). Check for dashboard error codes using a diagnostic scanner. Inspect all connections for corrosion or looseness, tightening any loose connectors and cleaning corroded terminals.
Best High Performance LED Headlight Bulbs and Compatibility
Choosing the right LED bulb requires matching the bulb type to your vehicle and understanding what "high performance" means. Performance is brightness combined with reliability, proper beam pattern, and electrical compatibility.
Brightness is measured in lumens. Most halogen headlights produce 800 to 1,200 lumens (sae.org). High-performance LEDs typically produce 6,000 to 10,000 lumens. The RMSH11B delivers 8,000 lumens at 60 watts with 6500K color temperature, providing daylight-white illumination that improves visibility without blinding oncoming drivers. The RMSH4M2S and RMSH1M2S both produce 10,000 lumens for off-road or low-light applications.
Color temperature affects visibility and legality. Lower temperatures (3000K to 4000K) produce yellow light that penetrates fog better. Higher temperatures (5500K to 6500K) produce white light with excellent contrast. Most standards require 4300K to 6500K. RMS Lighting LLC bulbs are calibrated to 6500K, meeting all requirements while maximizing visibility.
Beam pattern determines how light distributes on the road. Cheap LEDs often have poor patterns because the diode array doesn't align with reflector optics, creating scattered light that doesn't illuminate effectively and blinds other drivers. RMS Lighting LLC bulbs are engineered with correct lens patterns designed for factory headlight housings.
CANbus compatibility is critical for modern vehicles. Nearly all vehicles built after 2010 have CANbus systems. The RMSH11B is non-CANbus for older vehicles. For CANbus vehicles, ensure the bulb includes a CANbus decoder module or is explicitly rated for CANbus integration.
Thermal management separates premium LEDs from budget options. Premium bulbs incorporate active cooling fans and high-quality heat sinks. RMS Lighting LLC bulbs all feature built-in cooling fans and temperature-rated components that maintain safe operating conditions during extended use.
| Feature | Budget LED | Standard LED | Premium LED (RMS Lighting LLC) |
|---|---|---|---|
| Lumens | 4,000-6,000 | 6,000-8,000 | 8,000-10,000 |
| Color Temperature | Variable | 5500K-6500K | 6500K (regulated) |
| Cooling | Passive | Passive/Limited | Active fan + heat sink |
| Lifespan | 2,000-5,000 hours | 5,000-15,000 hours | 20,000-50,000 hours |
| Beam Pattern | Poor | Adequate | Optimized for factory housing |
| CANbus Compatible | Often problematic | Variable | Clearly specified |
| Price | $15-30 | $30-60 | $25-50 |
RMS Lighting LLC offers bulbs engineered for broad compatibility, with detailed fitment information for each product to ensure proper installation.
How to Install LED Headlight Conversion Kits Correctly
Proper installation is non-negotiable. Follow these steps carefully.
Step 1: Disconnect the Battery Disconnect the negative terminal of the battery to prevent accidental shorts and electrical damage. Wait 5 minutes to allow residual charge to dissipate.
Step 2: Remove the Headlight Housing Most vehicles require removing the headlight assembly from the front fascia. Consult your vehicle's service manual for specific procedures. Take photos as you disassemble so you remember how everything goes back together.
Step 3: Remove the Old Bulb Grasp the old halogen bulb firmly and rotate it counterclockwise (or clockwise, depending on your vehicle). Once loose, pull it straight out. Do not touch the glass envelope with bare hands.
Step 4: Clean the Housing Use a soft cloth to wipe the interior of the headlight housing. Remove any dust, debris, or oxidation to ensure the new LED bulb makes solid contact with the mounting surface.
Step 5: Prepare the LED Bulb Examine the LED bulb and its wiring harness. Identify the positive and negative wires. Most harnesses use red for positive and black for negative, but verify this before installation.
Step 6: Install the LED Bulb Insert the LED bulb into the headlight socket and rotate it clockwise until it seats fully. You should feel slight resistance as the heat sink makes contact with the housing. Do not force it.
Step 7: Connect the Wiring Harness Route the wiring harness away from hot surfaces and moving parts. Use cable ties to secure it to the vehicle frame or existing wiring bundles, keeping it at least 2 inches away from the engine block and exhaust manifold. Connect the positive wire to the positive terminal of the factory headlight connector and the negative wire to the negative terminal. Ensure connections are tight.
Step 8: Seal the Housing If the headlight housing has a rubber seal or gasket, reinstall it to prevent moisture from entering, which causes corrosion and electrical shorts.
Step 9: Reinstall the Headlight Assembly Carefully reinstall the headlight housing in the front fascia. Tighten all fasteners securely.
Step 10: Reconnect the Battery Reconnect the negative battery terminal. Wait 30 seconds for the vehicle's electrical system to initialize.
Step 11: Test the Headlights Start the vehicle and turn on the headlights. Both bulbs should illuminate immediately with no flickering. If you see flickering or error codes, turn off the headlights immediately and review your connections.
Step 12: Check Beam Pattern At night, park 25 feet from a wall and turn on the headlights. The beam should be centered with clear cutoff lines and no scattered light above the cutoff.
Total Installation Time: 30-60 minutes per headlight.
LED headlights fail early when thermal management is inadequate, electrical systems are unstable, or installation is poor. All three are preventable. Choose an LED bulb engineered for reliability, like those from RMS Lighting LLC, that includes active cooling and proper electrical integration. Install it correctly, ensuring solid connections and full heat sink contact. Maintain your vehicle's charging system and battery to ensure stable voltage. Do these things, and your LED headlights will deliver 25,000+ hours of bright, reliable illumination.
RMS Lighting LLC specializes in LED headlight bulbs and conversion kits designed to work reliably in real-world conditions. Our bulbs feature active cooling fans, correct lens patterns for factory housings, and clear CANbus specifications. Whether you're upgrading a classic car or modernizing an older truck, we've engineered our products to eliminate the common failure modes that plague cheap LED conversions. Learn more about our LED headlight solutions and experience the difference that precision-engineered lighting makes.
Frequently Asked Questions
Q: Why do LED headlights burn out faster than expected?
A: LED headlights fail prematurely due to inadequate thermal management, voltage spikes, and installation errors. Heat sinks and cooling fans must function properly to dissipate the diode's operating temperature. Voltage fluctuations from the vehicle's electrical system can damage the driver module. Poor installation, reversed polarity, loose connectors, or incompatible wiring harnesses, accelerates failure. Aftermarket bulbs without proper CANbus integration also struggle in vehicles with advanced electrical systems.
Q: How does heat affect the lifespan of automotive LED lights?
A: Heat is the primary enemy of LED longevity. LEDs generate significant thermal output despite their efficiency reputation. Without adequate heat dissipation through a quality heat sink and cooling fan, the diode junction temperature exceeds safe limits, causing rapid degradation and premature burnout. Operating temperatures above 85°C accelerate chemical breakdown inside the LED chip. Vehicles with poor headlight housing ventilation or blocked cooling paths see dramatically shortened lifespan. Proper thermal management can extend LED life by 50% or more.
Q: Can improper installation cause LED headlight failure?
A: Yes. Installation errors are a leading cause of early LED failure. Reversed polarity instantly damages the driver module. Loose or corroded connectors create voltage spikes that destroy diodes. Incorrect wiring harness routing exposes connections to moisture and vibration. Many vehicles require CANbus-compatible bulbs to prevent electrical load issues and dashboard error codes. Improper installation of any kit can cause failure within months.
Q: What are the signs that an LED headlight is failing?
A: Early warning signs include flickering, dimming, or a purple or orange tint instead of the expected 6500K cool white color. One bulb may fail while the other still functions. Some LEDs produce a scattered beam pattern that doesn't illuminate the road properly. Dashboard error codes, hyper-flashing turn signals, or warning lights indicate electrical compatibility issues. If you notice reduced lumens output or inconsistent brightness, the driver module or diode is degrading. Address these signs immediately to prevent complete failure and restore safe nighttime visibility.
This article was written using GrandRanker