



How to Install Red LED Interior Lights

Table of Contents
- What You'll Need Before Starting
- Automotive Electrical Safety Tips for LED Installation
- Locating and Removing Factory Bulb Housings
- Installing Red LED Interior Lights Step-by-Step
- LED Interior Light Kit Installation Time Expectations
- Canbus Compatibility and Error Code Prevention
- Legal Requirements for Interior Car Lighting
- Troubleshooting Common Installation Issues
- Frequently Asked Questions
Last Updated: September 25, 2026
What You'll Need Before Starting
Gather trim removal tools, a socket set, flashlight, and multimeter before starting. These prevent damage to panels and ensure safe electrical work.
Check your vehicle's manual for bulb size (common sizes: 194 T10 wedge, 31MM or 41MM festoon). RMS Lighting LLC's RMS194LEDRED 194 T10 Super Bright 300LM LED Bulbs are direct replacements delivering vibrant red light at 1.5 watts.

Keep a container for screws, wire stripper, and heat shrink tubing nearby. Have your vehicle's wiring diagram (from the owner's manual or online) showing power and ground locations.
Automotive Electrical Safety Tips for LED Installation
Always disconnect the battery before starting: remove the negative terminal first, then the positive. This prevents shorts that could damage electronics or cause injury.
Wait at least 5 minutes after disconnecting the battery to allow residual power to drain from capacitors.
Never work on wet surfaces or with wet hands. Ensure your garage is dry and wipe condensation from metal parts.
Test the circuit with a multimeter set to DC voltage mode. Zero volts means the circuit is safe; any voltage reading means recheck your battery disconnection.
Avoid cutting wires; damaged wires can cause fires. If you cut one, use heat shrink tubing and solder for a permanent repair.
Never force a bulb into a housing. Bulb housings have specific designs. Forcing a bulb can crack the lens cover or bend the connector pins. If a bulb doesn't slide in smoothly, you likely have the wrong size.
Locating and Removing Factory Bulb Housings
Interior lights are mounted in plastic housings on the ceiling, door panels, or trunk. Examine the housing from inside and locate the seam where the lens meets the body.
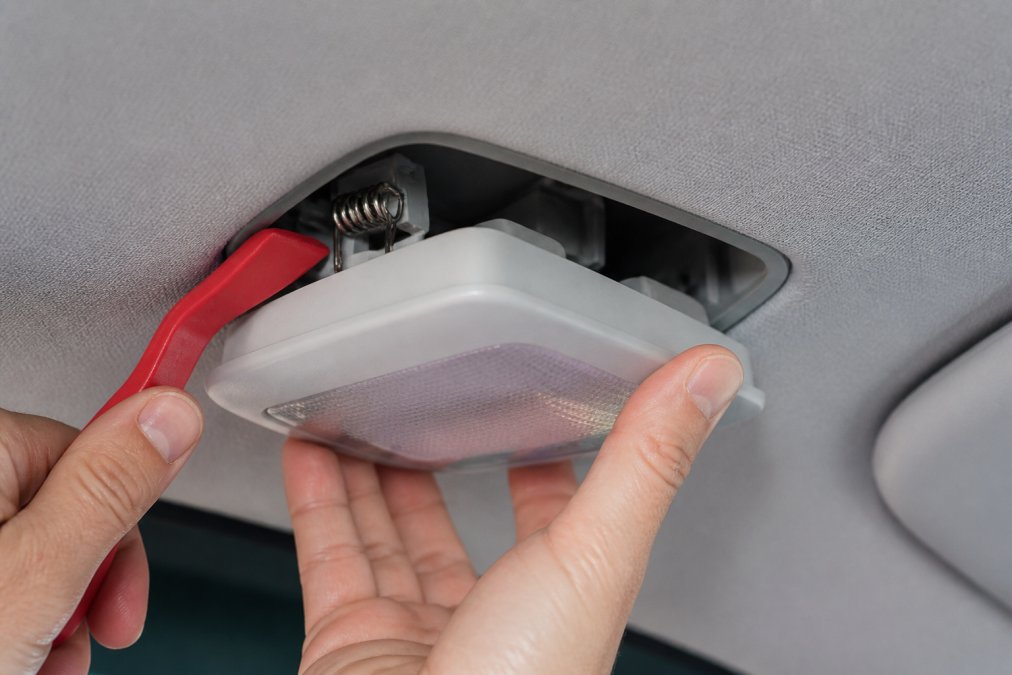
Housings use screws or spring clips. For screws, use a Phillips or flathead screwdriver. For clips, gently pry with a trim tool and twist to pop free.
Place fasteners in a container and photograph the housing before removal, especially when working on multiple lights.
Examine the bulb connector, most use wedge connectors (push-in) or bayonet connectors (twist-lock). This determines which LED bulb to buy.
The housing has a reflector cup directing light into the cabin. Don't touch it with bare hands; skin oils reduce light output.
Installing Red LED Interior Lights Step-by-Step
Step 1: Disconnect the Battery and Remove Trim
Open the hood and use a wrench to remove the negative terminal first, then the positive. Wait at least 5 minutes to drain residual power.
Remove trim panels blocking light access (headliner, sun visors, door trim). Gently pry with your trim tool, plastic clips break easily.
Step 2: Access the Bulb Housing and Remove the Factory Bulb
Pull the housing free, then grasp the bulb and pull straight out. Don't twist; twisting bends connector pins.
Inspect the connector socket for corrosion. Clean white or green oxidation with a wire brush; corrosion causes flickering.
Step 3: Install the Red LED Bulb and Test Fit
Take your new red LED bulb and examine the connector pins. They should be clean and straight. If any pins are bent, straighten them carefully with a small tool.
Insert the bulb straight into the connector socket. Push firmly until you feel it seat completely. The bulb should not wiggle or move when you gently tug on it.
RMS194LEDRED – 194 T10 Super Bright →
With the battery still disconnected, reconnect the negative terminal. Turn on your vehicle's interior lights. The red LEDs should illuminate immediately. If they don't light, turn off the lights and disconnect the battery again. Check the bulb connection and try reinserting it.
Step 4: Reassemble and Test All Lights
Once you confirm the bulb works, disconnect the battery again. Reinstall the bulb housing into its mounting point. Secure it with screws or spring clips, depending on your vehicle's design.
Reinstall any trim panels you removed. Make sure clips are fully seated. Loose trim can rattle while driving.
Reconnect the battery by attaching the positive cable first, then the negative cable. Tighten both terminal nuts securely.
Test every light switch in your vehicle. Turn on the dome light, map lights, trunk light, and any other interior lights you modified. They should all illuminate instantly with bright red light.
LED Interior Light Kit Installation Time Expectations
A simple single-bulb replacement takes about 15 to 20 minutes. This includes removing trim, disconnecting the battery, swapping the bulb, and reassembling everything.
If you're upgrading multiple interior lights at once, add 10 to 15 minutes per additional light. A full cabin upgrade with dome light, map lights, door lights, and trunk light typically takes 45 minutes to 1 hour for someone doing this for the first time.
Experienced DIYers often finish in 30 to 40 minutes total. You move faster once you understand where each housing is located and how your vehicle's trim clips work.
Unexpected issues like corroded connectors or stuck trim panels can add 20 to 30 minutes. If you encounter corrosion, budget extra time to clean the connector properly. Rushing this step leads to flickering lights or complete failure.
| Task | Estimated Time | Notes |
|---|---|---|
| Battery disconnect and safety checks | 5-10 minutes | Critical safety step |
| Trim removal for single light | 5-10 minutes | Varies by vehicle design |
| Bulb replacement | 2-3 minutes | Straightforward once housing is accessible |
| Testing and reassembly | 5-10 minutes | Verify all connections before reassembling |
| Full cabin upgrade (4-6 lights) | 45-60 minutes | Multiple bulbs with testing between each |
Canbus Compatibility and Error Code Prevention
Modern vehicles use a Canbus (Controller Area Network) system that monitors all electrical components. When you remove factory bulbs and install LEDs, the Canbus can detect the change and trigger error codes or warning lights on your dashboard.
This happens because LED bulbs draw far less current than factory halogen bulbs. The Canbus expects a certain amount of current draw from each circuit. When it detects less current, it thinks the bulb has burned out.
The solution is a load resistor or Canbus-compatible LED bulb. Load resistors mimic the current draw of factory bulbs. They're wired in parallel with the LED bulb. When the Canbus checks current draw, it measures the resistor's current plus the LED's current, totaling the expected amount.
Canbus-compatible LEDs have built-in resistors or capacitors that prevent error codes without needing external resistors. These bulbs cost more than basic LEDs, but they eliminate troubleshooting later.
Check your vehicle's year and make before buying.
Legal Requirements for Interior Car Lighting
Interior cabin lighting has minimal legal restrictions in most jurisdictions. The main rule is that interior lights cannot shine outward through windows in a way that blinds other drivers. This is rarely an issue with dome lights, map lights, or door courtesy lights since they're designed to illuminate the cabin interior only.
Troubleshooting Common Installation Issues
Lights won't turn on after installation. First, verify the battery is reconnected and the lights were working before you started. Disconnect the battery and remove the bulb. Inspect the connector socket for corrosion or bent pins. Clean with a wire brush if needed. Reinsert the bulb and test again. If still no light, use a multimeter to confirm power is reaching the socket.
Frequently Asked Questions
Are red interior lights legal for street use?
Red LED interior lights are legal for interior cabin use in all states. The National Highway Traffic Safety Administration (NHTSA) permits red interior accent lighting as long as it does not interfere with the vehicle's exterior brake lights, turn signals, or headlights. Interior dome lights, map lights, and footwell lights can be red without legal restriction. However, avoid wiring red LEDs to exterior-facing lights or areas that could be mistaken for brake or warning signals.
How do I know if red LED interior lights will cause dashboard error codes?
Dashboard error codes (hyper-flashing or Canbus errors) occur when LEDs draw insufficient current compared to factory halogen bulbs. RMS Lighting's 194 T10 Super Bright 300LM LED Bulbs - Red (2-Pack) produce 300 lumens with minimal power draw. To avoid errors, verify your vehicle's year and model support the bulb type, disconnect the battery before installation, and test fit before reassembling trim. If error codes appear, a load resistor wired in parallel with the LED may be required, consult your vehicle's wiring diagram for guidance.
How long does it take to install red LED interior lights?
Most red LED interior light installations take 30 minutes to 2 hours depending on how many locations you're upgrading and how accessible the bulb housings are in your vehicle. Simple dome light or map light replacements typically take 10-20 minutes per location. Interior cabin lights in hard-to-reach areas (under dash, behind trim panels) may take longer. Always allow extra time for your first installation to familiarize yourself with trim removal and connector types.
Do I need special wiring for red LED interior lights?
Most red LED interior lights are plug-and-play direct replacements that use the factory wiring harness, no special wiring is required. The RMS194LEDRED bulbs connect directly to existing 12V dome light and map light sockets. If you're wiring custom LED strip lighting or ambient lighting kits, you'll need to run power from the fuse box and ground to the chassis, using appropriately sized wire gauge (typically 18-20 gauge for low-current accent lighting) and inline fuses for safety. Always verify polarity and use heat shrink or solder joints for secure connections.