



LED Headlight Alternatives for Classic Cars

Table of Contents
- Why Classic Car Owners Choose LED Headlight Alternatives
- Best Plug-and-Play LED Headlight Kits for Sealed Beam Vehicles
- How to Upgrade Classic Car Headlights Without Modification
- DOT Compliant LED Headlight Conversion Standards
- Addressing Can-Bus and Electrical Load Challenges
- Comparing Beam Pattern Performance and Light Output
- Common Installation Mistakes and How to Avoid Them
- Conclusion
Last Updated: August 20, 2026
Why Classic Car Owners Choose LED Headlight Alternatives
Factory sealed beam headlights from the 1960s through 1980s produce dim, diffuse light that barely illuminates the road. LED headlight alternatives solve this problem while preserving the vintage aesthetic. At RMS Lighting LLC, we've worked with classic car owners who want better visibility without losing the original look.
Traditional HID conversions require cutting into housings and rewiring electrical systems. LED headlight alternatives offer a better path: plug-and-play kits that fit factory sealed beam housings, deliver modern light output, and maintain correct beam patterns for road safety. These kits eliminate heat buildup that damages vintage wiring, reduce electrical draw on aging charging systems, and work with your existing sealed beam housing, no modification required.
Best Plug-and-Play LED Headlight Kits for Sealed Beam Vehicles
A quality LED headlight alternative delivers a sharp cutoff line that keeps light off oncoming traffic, consistent color temperature across both headlights, and beam spread that actually illuminates the road. The best kits feature OE-spec glass lenses, adjustable rotating bulb bases for precise alignment, built-in drivers with active cooling fans, and designs engineered specifically for LED rather than retrofitted from incandescent specs.
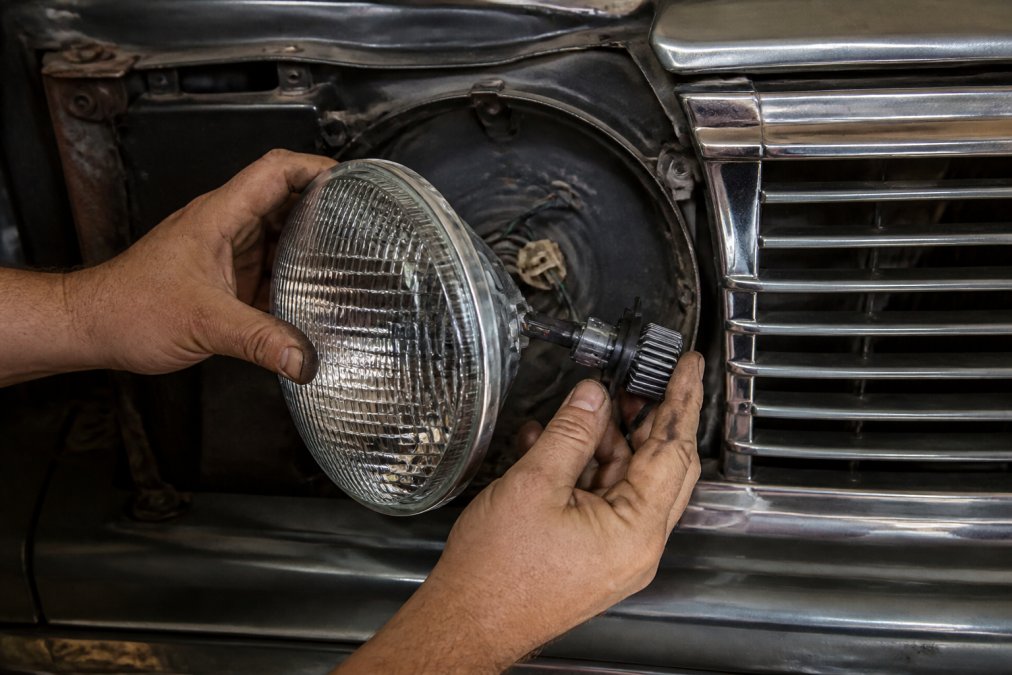
7-Inch Round Conversion Kit (Gen2)
The 7-inch round sealed beam format is standard on countless classic vehicles. The RMS Lighting LLC 7-inch Gen2 Round Headlight Conversion Kit delivers 10,000 lumens per bulb with a 6500K cool white color temperature. The Gen2 glass lens was engineered specifically for LED bulbs, producing a clean beam pattern with a sharp cutoff line.

The kit includes two 10,000-lumen H4 LED bulbs with 6 CSP CREE 1860 LED chips, active cooling fans, built-in drivers, and IP68 waterproof rating. Operating temperature range spans -40°C to +85°C. The 2-year warranty covers the LED bulbs, and installation takes roughly 30 minutes per side. At $179.00, this kit fits H6024, 6014, 6015, and 6016 sealed beam replacements.
5.75-Inch Round Conversion Kit (Gen3PRO)
For vehicles equipped with 5.75-inch round sealed beams, the Gen3PRO uses H4 Mini Projector LED technology, producing the sharp, defined beam pattern found in modern factory projector headlights. Projector lenses create more controlled beam spread with a sharper cutoff than reflector-style LEDs, which matters most on highways where you need precise light distribution without spilling into oncoming traffic.
The kit includes four 10,000-lumen H4 Mini Projector LED bulbs, four Gen3PRO 5.75-inch round glass housings with metal construction, and two plug-and-play harness adapters. The bulbs feature the same CSP CREE 1860 chip configuration, active cooling, and IP68 waterproof rating as the Gen2 kits. At $289.00, the Gen3PRO costs more but the projector lens technology justifies the difference for frequent nighttime or highway driving.
4x6 and 5x7 Square Sealed Beam Kits
Square sealed beams were common on G-body Chevrolets, Camaros, Firebirds, and 1980s square body trucks. The RMS Lighting LLC 4x6 Gen2 Small Square Headlight Conversion Kit includes two pairs of 10,000-lumen H4 LED bulbs, two pairs of 4x6 gen2 glass housings with reflective backgrounds, and two H4-to-factory harness adapters. At $269.00, this quad headlight set fits H4651, H4653, H4666, and H6545 sealed beam replacements.
The 5x7 Gen2 Large Square Headlight Conversion Kit includes two 10,000-lumen H4 LED bulbs, two 5x7 Gen2 glass housings with bulb covers and reflective backing. At $179.00, it fits H6054, H6054ST, H6054XV, H6052, H6053, and 6052 replacements commonly found on Toyota Corollas, Mazda RX-7s, and older Chevrolet Malibus. Both kits use OE-spec glass lenses and rotating bulb bases for proper alignment without modification.
How to Upgrade Classic Car Headlights Without Modification
True plug-and-play means the new kit connects to your factory harness without cutting, soldering, or rewiring.
Assessing Your Current Sealed Beam Housing
Before ordering any LED headlight alternative kit, identify your exact sealed beam format and housing condition. Count how many sealed beam units you have on each side. Most classic vehicles use either two round sealed beams (one per side) or four smaller sealed beams (two per side, known as quad headlights).
Measure the sealed beam housing. Round sealed beams are measured in inches across the diameter: 5.75 inches, 6 inches, and 7 inches are most common. Square sealed beams are measured by width and height: 4x6 inches and 5x7 inches are standard. Finally, examine the sealed beam connector on the back of the housing. Most classic vehicles use either H4 three-prong connectors or factory two-prong high beam connectors. If your vehicle has a two-prong connector, you'll need a kit that includes H4-to-factory harness adapters.
Installation Steps for Plug-and-Play Kits
Installation of a true plug-and-play LED headlight alternative kit requires no special tools beyond a screwdriver and basic mechanical confidence.
Step 1: Disconnect the Battery Disconnect the negative terminal of your battery to prevent accidental shorts.
Step 2: Remove the Factory Sealed Beam Housing Most sealed beam housings are held in place by a metal retaining ring. Using a screwdriver, carefully remove the screws holding the retaining ring. Gently pull the entire housing assembly forward and disconnect the factory connector on the back.
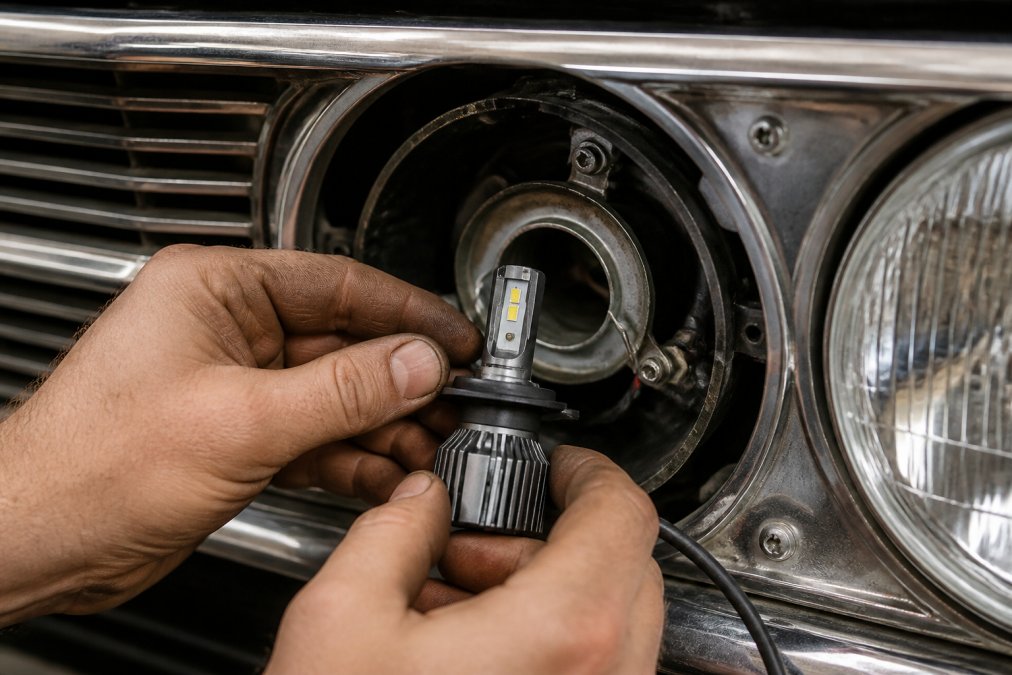
Step 3: Install the New LED Housing Align the new LED headlight housing with the mounting hole and insert it into the vehicle's headlight cavity. Secure the retaining ring with the factory screws, tightening firmly but not excessively.
Step 4: Connect the Harness Adapter If your vehicle uses factory two-prong high beam connectors, connect the H4-to-factory harness adapter to the factory connector. Then plug the H4 connector from the new LED housing into the adapter. If your vehicle already has H4 connectors, plug the LED housing connector directly into the factory harness.
Step 5: Reconnect the Battery Once both headlights are installed and all connectors are secure, reconnect the negative battery terminal. Turn on the headlights to verify both units illuminate.
Step 6: Test Beam Alignment Turn on the low beams and observe the light pattern on a wall or garage door from about 25 feet away. The beam should form a clear, defined pattern with a sharp cutoff line at the top.
Beam Pattern Alignment and Testing
A properly aligned beam pattern is the difference between a headlight upgrade that works and one that creates safety problems. Most LED headlight alternatives include an adjustable rotating bulb base that lets you dial in perfect alignment without any modification.
Park the vehicle on level ground approximately 25 feet from a white wall or garage door. Turn on the low beams and observe the light pattern on the wall. The beam should form a defined rectangular or circular pattern with a sharp cutoff line running horizontally across the middle. The light should be concentrated on the lower portion of the wall, with minimal light spilling above the cutoff line.
If the beam is too high, rotate the bulb base downward. If the beam is too low, rotate the collar upward. Make small adjustments, a quarter turn usually moves the beam noticeably.
DOT Compliant LED Headlight Conversion Standards
A headlight can be bright and efficient but still illegal to use on public roads if it doesn't meet Department of Transportation (DOT) standards. DOT regulations require specific standards for beam pattern, light output, and color temperature. The critical requirement is the cutoff line: the sharp horizontal line that separates the illuminated portion of the road from the dark sky.
Factory sealed beam headlights were designed around incandescent filament bulbs, which produce light in all directions. When you replace an incandescent bulb with an LED bulb that has a different light distribution pattern, the housing geometry no longer produces the correct cutoff line unless the LED bulb is specifically engineered for that housing design.
Cheap LED bulb replacements fail because they're not designed for the sealed beam housing geometry. RMS Lighting LLC's Gen2 and Gen3PRO kits address this by engineering the LED bulb and housing together as a system. The housing reflector and lens geometry are redesigned specifically for LED light distribution, producing a beam pattern that meets DOT standards. The color temperature uses 6500K cool white, which sits at the upper end of the legal 4000K to 6500K range and provides excellent visibility.
Addressing Can-Bus and Electrical Load Challenges
Modern vehicles use can-bus (Controller Area Network) systems to manage electrical components and monitor system health. Classic vehicles don't have can-bus, which eliminates compatibility issues with modern LED kits.
Factory sealed beam headlights draw significant current, a pair of 7-inch sealed beams might draw 60-80 amps. Many classic vehicles have charging systems rated for 60-100 amps total, so headlights consume a substantial portion of available capacity. LED bulbs draw far less current. A pair of 10,000-lumen LED bulbs might draw only 10-15 amps, reducing the load on your aging alternator and charging system. RMS Lighting LLC kits include built-in drivers and proper voltage regulation, ensuring stable operation regardless of vehicle voltage fluctuations.
Comparing Beam Pattern Performance and Light Output
Brightness alone doesn't determine headlight quality. Two headlights can produce identical lumen output but deliver completely different visibility because of beam pattern differences. Lumens measure total light output from the bulb. Lux measures illumination intensity at a specific distance. Beam pattern describes how light is distributed across the road surface.
The RMS Lighting LLC Gen2 kits deliver 10,000 lumens with a beam pattern optimized for sealed beam housings. The 6500K color temperature provides excellent visibility without excessive blue light. For most classic car owners driving at night on local roads, this is the right balance of performance and reliability.
The Gen3PRO kits add mini projector lens technology, which tightens the beam pattern and increases lux values at distance. If you drive frequently at highway speeds or on dark rural roads, the Gen3PRO's superior beam control is worth the additional investment.
Common Installation Mistakes and How to Avoid Them
Most LED headlight alternative installation problems stem from a handful of predictable mistakes.
Mistake 1: Wrong Sealed Beam Size The most common error is ordering a kit for the wrong sealed beam size. A 5.75-inch kit won't fit a 7-inch housing. Measure your sealed beam housing carefully before ordering.
Mistake 2: Neglecting Beam Alignment Installing the housing correctly but skipping the beam alignment step leaves you with misaligned headlights that either blind oncoming drivers or fail to illuminate the road properly. Always test the beam pattern on a wall and adjust the rotating bulb base if needed.
Mistake 3: Overtightening the Retaining Ring The new glass lenses are durable but not indestructible. Overtightening the retaining ring can crack the lens. Tighten the ring firmly until snug, then stop.
Mistake 4: Failing to Seat Connectors Fully A connector that looks plugged in might not be fully seated, creating intermittent electrical contact. Push connectors together firmly until you hear or feel a click.
Mistake 5: Skipping the Battery Disconnect Always disconnect the negative battery terminal before starting installation to prevent accidental shorts.
Mistake 6: Ignoring Harness Adapter Compatibility If your vehicle uses factory two-prong high beam connectors, you need the H4-to-factory adapter. Installing an H4 connector directly into a two-prong socket creates a loose connection that fails immediately or intermittently.
Modern LED headlight alternatives have solved the classic car owner's dilemma: how to upgrade nighttime visibility without sacrificing the factory appearance that makes these vehicles special. RMS Lighting LLC's plug-and-play conversion kits deliver 10,000 lumens of clean, well-distributed light with proper DOT-compliant beam patterns and zero modification required.
The 7-inch Gen2 kit at $179.00 handles most common sealed beam formats. The 5.75-inch Gen3PRO at $289.00 adds projector lens technology for superior beam control on highways. The 4x6 and 5x7 square sealed beam kits address vehicles with different housing geometries. Each kit includes OE-spec glass lenses, adjustable rotating bulb bases, active cooling, and a 2-year warranty on LED bulbs.
Installation requires no cutting, soldering, or rewiring. The rotating bulb base allows precise beam alignment without modification. Electrical load actually decreases, reducing strain on your classic vehicle's charging system. Get started with RMS Lighting LLC and transform your nighttime visibility while keeping your classic car looking exactly as it should.
Frequently Asked Questions
Will LED headlight conversion kits cause dashboard error codes or hyper-flashing in my classic car?
Modern LED kits with built-in drivers and proper harness adapters eliminate most error codes and hyper-flashing issues that plagued early LED conversions. The key is choosing kits designed specifically for your vehicle's electrical system. Plug-and-play options with H4-to-factory harness adapters (like those included in RMS Lighting kits) adapt the 3-prong H4 connector to your original 2-prong high beam connector, preventing electrical conflicts. However, vehicles with can-bus systems may require load resistors or can-bus decoders to prevent flickering. Always verify compatibility with your vehicle's year and model before purchase.
Can I install LED headlight conversion kits in my older sealed beam housing without modification?
Yes, true plug-and-play LED conversion kits are designed to fit sealed beam housings without modification. These kits replace the entire housing and bulb assembly while maintaining the original mounting points and electrical connectors. The conversion works because sealed beam housings have standardized dimensions (5.75-inch, 7-inch, 4x6, and 5x7 are common sizes). Before ordering, confirm your exact sealed beam part number (H5001, H6054, H4651, etc.) to ensure the kit matches your housing size. Some vehicles may require harness adapters to connect the new LED bulbs to factory connectors.
Are LED headlight conversion kits DOT compliant for use on public roads?
LED conversion kits can be DOT compliant if they meet specific standards: the housing must produce a proper cutoff line (sharp boundary between lit and unlit areas), the beam pattern must match left-hand drive specifications for North American roads, and light output must fall within legal lux ranges at specific distances. Many aftermarket kits fail these requirements because they use right-hand drive optics or poor reflector designs that create glare. Kits with glass OE-spec lenses and proper reflector housings are more likely to meet DOT standards. However, legality varies by state, some states restrict any aftermarket headlight modification. Check your local regulations before installation.
What's the difference between reflector-style and projector LED bulbs for classic cars?
Reflector-style LED bulbs (standard H4 design) scatter light across a wide beam spread, relying on the housing's reflector bowl to shape the beam. Projector-style LED bulbs (mini projector design) use a lens to focus light into a sharp, defined cutoff line similar to modern factory headlights. Projector LEDs deliver better nighttime visibility and reduced glare because the cutoff is sharper and more precise. The trade-off is that projector kits (like the Gen3PRO) cost more than reflector kits but provide significantly better beam pattern control. For classic cars with original sealed beam housings, projector conversions offer the best balance of performance and factory appearance.
This article was written using GrandRanker