



How to Aim LED Headlights Correctly

Table of Contents
- Why Proper LED Headlight Aiming Matters
- What You'll Need: Headlight Adjustment Tools
- Step-by-Step: How to Aim LED Headlights
- How to Check Headlight Alignment at Home
- Troubleshooting LED Headlight Glare
- LED-Specific Beam Pattern Considerations
- Compliance and Safety Standards
- Conclusion
Last Updated: August 19, 2026
Why Proper LED Headlight Aiming Matters
Getting your LED headlight beam pattern right isn't just about seeing better at night, it's about safety for everyone on the road. Improper aiming creates glare that blinds oncoming drivers, reduces your own visibility, and can trigger compliance issues during vehicle inspections. When you aim LED headlights correctly, the cutoff line sits precisely where it should, beam intensity concentrates where you need it most, and you avoid scattered light that leaves dark spots on the road ahead.
The challenge with LED conversions is that they behave differently than factory halogen bulbs. LEDs produce light from a different point within the housing and have significantly higher lumen output. This means the reflector housing and projector lens, designed for halogen filaments, may not focus LED light the same way. A misaligned LED headlight defeats the purpose of upgrading to brighter, more efficient lighting.
RMS Lighting LLC has tested this extensively with their LED headlight conversion kits. The difference between a properly aimed kit and a carelessly installed one is dramatic: one produces a clean, focused beam with a sharp horizontal cutoff line; the other creates glare, dark spots, and wasted light spilling upward. This guide walks you through the exact process to get it right the first time.

What You'll Need: Headlight Adjustment Tools
Before you start, gather the right tools. You don't need much, but having everything on hand ensures precision.
Essential tools:
- Phillips screwdriver (for most adjustment screws)
- Hex key or Allen wrench (some vehicles use these instead)
- Tape measure or measuring wheel
- Masking tape or painter's tape
- Marker or chalk for marking reference points
- A level surface (your driveway or garage floor)
- A wall or flat surface 25 feet away (standard headlight aiming distance)
- A flashlight or work light for seeing adjustment screws clearly
Optional but helpful:
- Headlight aiming tool or alignment kit
- Second person to help observe beam patterns
- Vehicle manual or online spec sheet showing adjustment screw locations
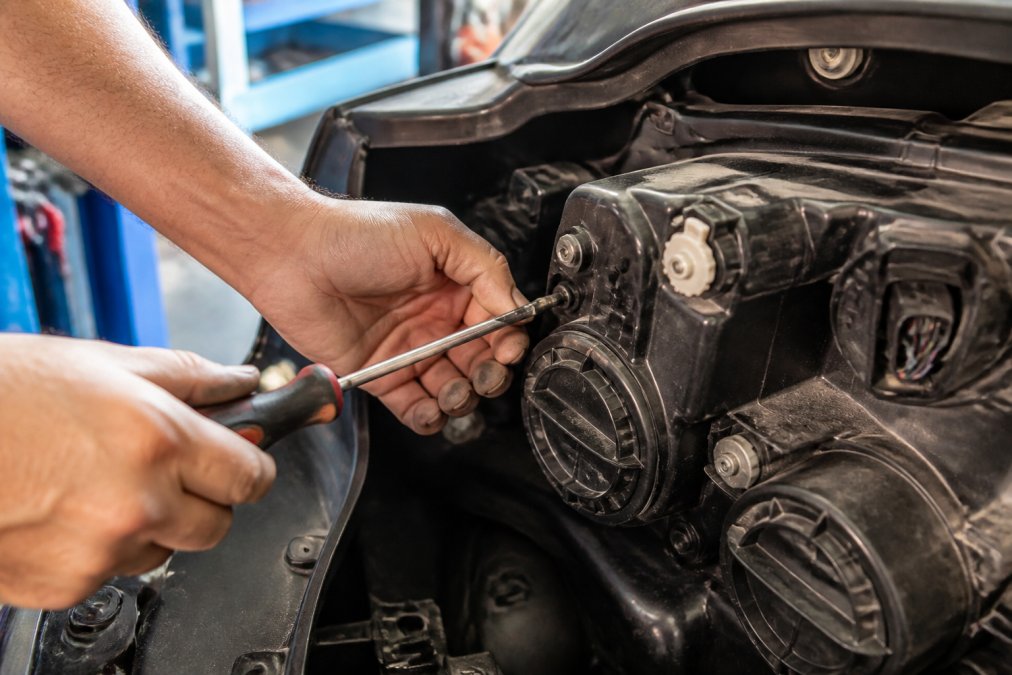
The adjustment screws are usually located on the back of the headlight housing or on the sides. Some vehicles hide them behind the bumper or require removing trim panels. Check your vehicle's documentation before you start. The screws typically control vertical and horizontal movement independently.
Step-by-Step: How to Aim LED Headlights
Step 1: Prepare Your Vehicle and Find a Level Surface
Park your vehicle on a level surface. Any slope throws off your aiming reference points. Your driveway, garage floor, or parking lot works fine as long as it's genuinely level. Make sure the vehicle is fully loaded the way you'd normally drive it, fuel tank full or near-full, normal cargo weight, driver in the seat. Different weight distributions change the vehicle's angle slightly, affecting headlight aiming.
Turn off the headlights and let the vehicle sit for a few minutes to allow thermal expansion to settle. Adjust your seat to your normal driving position, then proceed to the next step.
Step 2: Measure Distance and Mark Your Reference Points
Measure 25 feet from the front of your vehicle to a wall or flat vertical surface. This is the standard distance used for headlight aiming specifications. Mark this distance with tape on the ground or note where it falls on your driveway.
Measure the height of your headlight centers from the ground and mark this height on the wall at the 25-foot distance using masking tape and a marker. Do this for both headlights. Next, mark a horizontal line on the wall at the same height as your headlight centers. The beam's cutoff line should sit slightly below this horizontal line when properly aimed, typically 2 to 4 inches below at the 25-foot distance. Consult your vehicle manual or LED conversion kit documentation for the exact specification.
Step 3: Identify the Headlight Center Point and Adjustment Screws
Look at the back of your headlight housing for two adjustment screws: one controlling vertical movement (up and down) and one controlling horizontal movement (left and right). The vertical screw is usually positioned above or below the center of the housing; the horizontal screw is usually on the side.
Turn the vertical screw clockwise to move the beam up, counterclockwise to move it down. The horizontal screw works similarly, one direction moves the beam inward, the other outward. Mark the current position of each screw with a marker so you can return to this starting point if needed.
Step 4: Adjust Vertical and Horizontal Alignment
Turn on your headlights and observe the beam pattern on the wall. You're looking for the cutoff line, the sharp horizontal boundary between the bright beam and the dark area above it. This cutoff line should be relatively straight and sit slightly below your marked horizontal reference line.
For vertical alignment: If the beam is too high, turn the vertical adjustment screw counterclockwise in small quarter-turn increments. If the beam is too low, turn it clockwise. Make one small adjustment, step back, and observe the change. Aim for that cutoff line to sit 2 to 4 inches below your horizontal reference mark at the 25-foot distance.
For horizontal alignment: The beam should be centered left to right on the wall. Adjust the horizontal screw to move the beam left or right as needed. Both headlights should produce beams that are evenly positioned relative to the centerline of the wall.
Patience pays off here. After each adjustment, walk back to your 25-foot reference point and observe. The beam pattern on the wall tells you everything you need to know.
Step 5: Test the Beam Pattern and Cutoff Line
Once the vertical and horizontal alignment looks correct, examine the beam pattern closely. The cutoff line should be clean and sharp, not fuzzy or jagged. The bright area below the cutoff should be relatively uniform in intensity, without dark spots or hot spots. Check both headlights, they should produce similar beam patterns. If one looks significantly different, make fine adjustments to bring them into alignment.
How to Check Headlight Alignment at Home
The 25-foot wall test is the standard, but other methods help verify your aiming without specialized equipment.
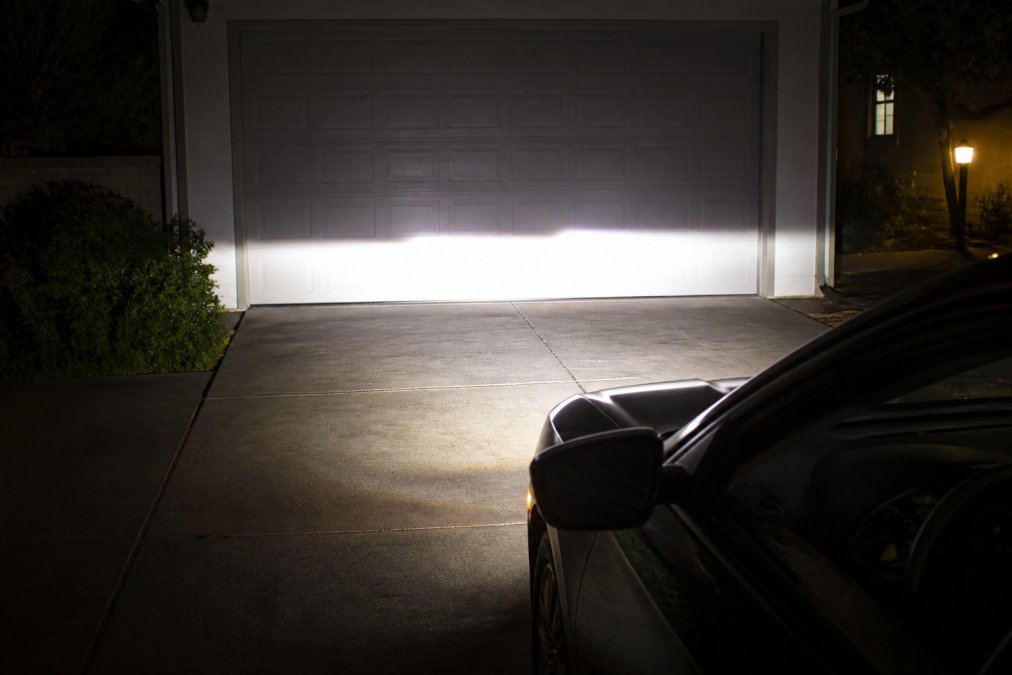
The parking lot test: Find a large, empty parking lot at night. Park your vehicle and turn on the headlights. Walk in front of the vehicle at various distances (10, 25, 50 feet) and observe the beam pattern. The light should feel focused and directional, not scattered. You should see the road ahead clearly without excessive glare in your peripheral vision.
The oncoming traffic test: Drive toward a parked vehicle or wall at night with your headlights on. The beam should light up the road surface ahead without creating glare that reflects back into your eyes. If you're getting significant glare, the beam is aimed too high.
The dark road test: Drive on a quiet road at night and assess visibility. Can you see road markings, curbs, and obstacles clearly? A properly aimed LED headlight should provide crisp visibility without dark spots or excessive brightness in the center.
Troubleshooting LED Headlight Glare
Glare is the most common complaint after LED headlight installation. Understanding the difference between normal LED brightness and actual glare helps you diagnose the problem correctly.
Is it glare or just bright light? LEDs produce more lumen output than halogen bulbs, so they're naturally brighter. True glare occurs when light scatters upward and sideways, creating a halo effect or blinding oncoming drivers. A properly aimed LED beam should be bright but focused, not scattered.
Glare caused by misalignment: If your beam is aimed too high, it will create glare for oncoming traffic. Adjust the vertical screw downward in small increments and retest. The cutoff line should sit 2 to 4 inches below the horizontal centerline.
Glare from reflector housing incompatibility: The reflector housing was designed for halogen light, which originates from a different point in the bulb. When you install an LED with a different light-origin point, the reflector may not focus the light correctly, creating a scattered beam pattern. RMS Lighting LLC's conversion kits are designed with this in mind, the bulbs sit in the correct position within the housing to produce a proper beam pattern.
Glare from driving conditions: Fog, rain, and wet road surfaces reflect light differently than dry pavement. On foggy nights, even properly aimed LED headlights can seem to create glare because moisture scatters the light. This isn't a misalignment issue. Some LED kits offer adjustable brightness; dimming slightly in poor visibility can reduce perceived glare without sacrificing safety.
LED-Specific Beam Pattern Considerations
LED headlights behave differently than halogen bulbs in ways that affect aiming.
Light origin point: Halogen filaments emit light from a specific point. LEDs use an array of diodes spread across a small surface. This difference means the reflector housing focuses LED light slightly differently than halogen light. Purpose-designed LED conversion kits account for this difference.
Beam intensity and uniformity: LEDs produce light more efficiently, concentrating more lumens in a smaller area. This creates a brighter central beam with sharper edges. The beam can look less uniform than halogen light, with a bright center and darker edges. This is normal and doesn't indicate misalignment. What matters is a clean cutoff line and no scattered glare above it.
Color temperature and perception: LEDs typically produce cooler, whiter light than halogen bulbs. This cooler light can feel brighter to other drivers even at the same lumen output. If you're getting genuine complaints from oncoming drivers, verify your aiming using the wall test.
Thermal stability: LEDs generate less heat than halogens but still produce some. Light output can shift slightly as the LED warms up during extended driving. If you notice the beam pattern changing as you drive, it's likely thermal settling, not a mechanical shift.
Compliance and Safety Standards
Your vehicle's headlights must meet Federal Motor Vehicle Safety Standard (FMVSS) 108, which establishes requirements for headlight performance, beam patterns, and glare limits. Proper aiming is essential for compliance. A misaligned headlight that creates excessive glare can violate this standard and cause inspection failures in some jurisdictions.
The standard specifies that the cutoff line must be sharp and positioned correctly, with minimal glare above it. When you aim your LED headlights correctly, you ensure compliance with federal standards and prioritize safety for yourself and other drivers.
Conclusion
Aiming LED headlights correctly is a straightforward process when you understand the steps and have the right reference points. The 25-foot wall test, combined with small adjustment increments and real-world verification, gets you to a properly aimed beam in under an hour. Patience and small quarter-turn adjustments produce better results than aggressive turning.
If you've upgraded to an LED conversion kit from RMS Lighting LLC, you're starting with a product engineered to produce proper beam patterns when installed and aimed correctly. Their kits feature correct LHD lens patterns and reflector housings designed specifically for LED light distribution. Once you've completed this aiming process, you'll experience the full benefit of improved visibility and efficient light output that LED technology provides. Get started with RMS Lighting LLC and transform your nighttime driving visibility.
Frequently Asked Questions
How high should LED headlights be aimed at 25 feet?
At 25 feet, the cutoff line of your low beam should sit at or slightly below the center point of the headlight housing on the wall. For most vehicles, this means the beam should be approximately 2-4 inches below the center point at that distance. The exact height depends on your vehicle's ride height and headlight mounting angle. Always refer to your vehicle's service manual for manufacturer specifications, and adjust until oncoming traffic is not affected by glare.
Do LED headlight bulbs require different aiming than halogen?
LED bulbs produce a different beam pattern than halogen due to their light source position and intensity. Most quality LED conversion kits, like those from RMS Lighting, are engineered with a lens pattern that mimics factory halogen output, so standard aiming procedures apply. However, LED beams tend to have sharper cutoff lines and higher lumen output. Always verify that your LED kit is designed for your specific headlight housing type to ensure the beam pattern aligns correctly.
What should I do if my LED headlights create glare for oncoming drivers?
Glare typically results from misalignment, incorrect bulb positioning in the housing, or incompatible LED bulbs for your headlight type. First, recheck your vertical and horizontal adjustment using the 25-foot wall test. If the cutoff line is too high, lower the beam. If the issue persists, verify that your LED bulb's contact point matches the factory halogen position. Using a conversion kit specifically matched to your headlight housing, like RMS Lighting's sealed beam kits, minimizes this risk.
Can I check my headlight alignment at home without special equipment?
Yes. Park your vehicle 25 feet from a wall on level ground in darkness. Turn on your low beam and observe where the cutoff line hits the wall relative to your headlight center points. Mark the center of each headlight on the wall at the same height. The beam should sit at or slightly below center, with the cutoff line sharp and level. This visual diagnostic is reliable for detecting major misalignment and is the standard home method used before professional alignment.
This article was written using GrandRanker