



Why Do LED Headlights Flicker? Causes and Fixes

Table of Contents
- Why Do LED Headlights Flicker? The Core Reasons
- Voltage Fluctuations, Wiring, and Hardware Failures
- Load Resistors and Decoders: How They Stop Flicker
- How to Fix Hyperflashing Turn Signals
- LED Headlight Anti-Flicker Harness: When You Need One
- CANbus LED Compatibility: Matching Bulbs to Your Vehicle
- PWM vs. Constant Current Drivers and Thermal Management
- Frequently Asked Questions
Last Updated: September 11, 2026
Why Do LED Headlights Flicker? The Core Reasons
LED headlights flicker because the vehicle's electrical system was never designed to feed a light-emitting diode. Factory halogen bulbs draw steady current and don't care how it arrives; LEDs contain driver circuitry that reacts to every interruption, pulse, or voltage sag.
Three failure modes cause most of it: the Body Control Module (BCM) cuts power when it detects unexpected resistance; Pulse Width Modulation (PWM) chops voltage into rapid on-off cycles the LED driver misreads; and voltage fluctuation, from a weak ground or tired relay, starves the driver long enough to reset it. Below, we'll walk through each cause in order of likelihood, then show you how to fix it.
CANBUS System Errors and Bulb Out Warnings
Modern vehicles run a Controller Area Network (CANBUS) that monitors every bulb circuit for expected resistance. A halogen bulb draws several amps; an LED draws a fraction of that. The BCM reads the low draw as a burned-out bulb and pulses power to test the circuit, which the LED interprets as a command to strobe. That's why a dashboard "bulb out" warning and flicker so often arrive together. The fix is to restore the resistance the module expects: a load resistor wired in parallel across the bulb circuit. On older vehicles with no CANBUS monitoring, you'll rarely see this problem at all.
Pulse Width Modulation (PWM) Explained
Pulse Width Modulation (PWM) controls brightness by switching voltage on and off hundreds or thousands of times per second. The human eye averages those pulses into a steady glow. An LED driver may not.
When the PWM frequency is low or the duty cycle unusual, a poorly matched driver can't smooth the input, producing visible flicker, often at idle or low RPM. Some drivers handle this gracefully; others need an inline decoder or capacitor to buffer the signal.
If your lights flicker only at certain times, PWM interaction is a strong suspect.
Voltage Fluctuations, Wiring, and Hardware Failures
Voltage fluctuation is the second major category, and where DIY installs most often go wrong. An LED driver needs a stable supply; anything that drops voltage below its threshold, even for milliseconds, causes a reset that reads as flicker.
Two hardware problems dominate: bad grounds and worn relays. Both are cheap to fix and easy to overlook.
Loose or Damaged Wiring and Grounding Issues
Grounding issues produce some of the strangest symptoms in automotive lighting. A corroded ground point, loose connector pin, or chafed wire introduces intermittent contact and voltage drop, so the LED flickers when the connection breaks and recovers when it reconnects.
Start your diagnosis at the ground. A common mistake is chasing the bulb while the real fault sits at a chassis ground stud caked in corrosion. Clean it, tighten it, and retest before buying anything.
Check the wiring harness too. Rodent damage, heat brittleness, and previous owner splices create current leakage and resistance a halogen bulb would tolerate but an LED will not.
Faulty or Aging Headlight Relays
A failing headlight relay chatters. Its contacts pit and oxidize over years of arcing, and the coil weakens until it can't hold them closed under load. The circuit opens and closes rapidly, and the LED reproduces every interruption. You'll often hear a faint buzzing from the relay box, or notice the flicker worsens over bumps. Swapping in a known-good relay is a fast, inexpensive test. If the relay is fine, move on to the driver and bulb compatibility.
Load Resistors and Decoders: How They Stop Flicker
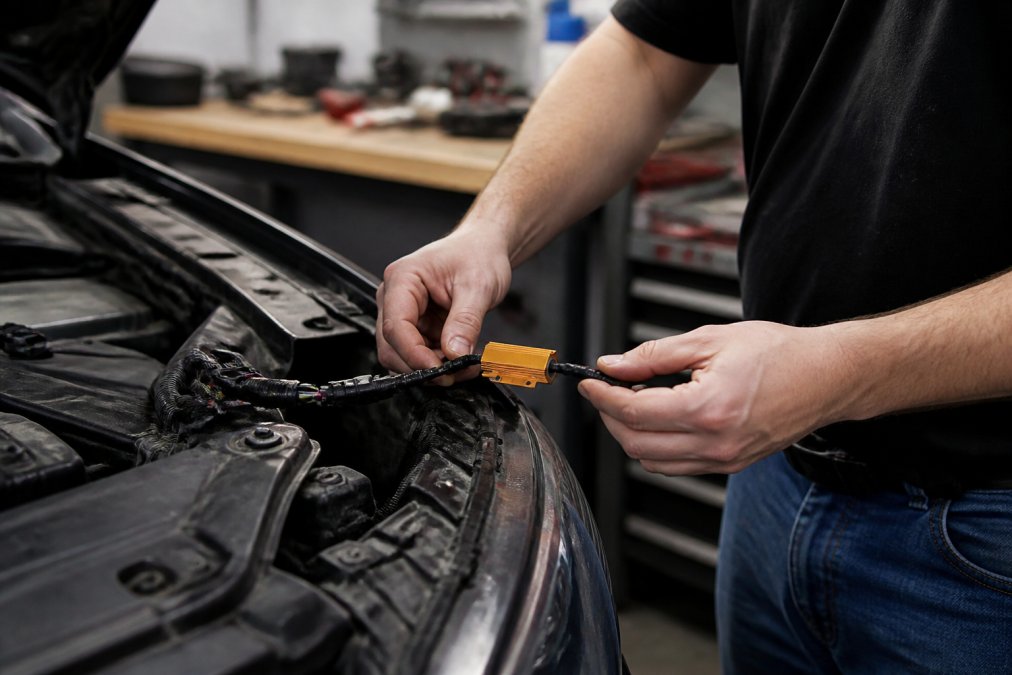
A load resistor is a ceramic power resistor wired in parallel with the LED bulb to simulate the original halogen's current draw, restoring the resistance the BCM expects. A decoder is an inline module that conditions the signal, smoothing PWM pulses and filtering voltage spikes before they reach the LED driver. They solve different problems; mixing them up wastes money and time.
How a Load Resistor Actually Works
Resistance is the currency your vehicle's monitoring system trades in. A typical halogen bulb draws roughly 4 to 5 amps at 12 volts, about 2.5 to 3 ohms (energy.gov). An LED replacement for the same socket may draw only 0.5 to 1.5 amps. The BCM sees that low current, concludes the bulb is burned out, and either pulses the circuit to test it or triggers a dashboard warning. A load resistor wired in parallel gives the module a path to ground that draws the missing current. Common values are 6 ohm and 8 ohm, rated 25 to 50 watts; a 6 ohm resistor across 12 volts draws about 2 amps and dissipates roughly 24 watts of heat, which is why these resistors are ceramic and get hot enough to burn skin. Wire the resistor in parallel, across the bulb's positive and negative leads, not in series, where it would drop voltage and dim your lights. Use the supplied scotch-lok connectors or solder and heat-shrink, and mount the resistor body against bare metal with the included bracket. Never zip-tie it to plastic trim, wire loom, or a fuel line.
How a Decoder Differs
A decoder does not fake current draw. It sits inline between the factory connector and the bulb and cleans the electrical signal, buffering PWM pulses, clamping voltage spikes, and in some designs providing a capacitor bank that rides through brief voltage sags. Decoders suit flicker with no bulb-out warning, flicker tied to PWM dimming, or vehicles that pulse the lighting circuit for reasons other than bulb monitoring.
Some decoders combine both functions: a small resistive element plus signal conditioning. These are often sold as "anti-flicker modules" or "error-free modules" and are the most forgiving option for vehicles where you cannot predict which problem you have.
Choosing Between Them
| Symptom | Likely Cause | Fix |
|---|---|---|
| Flicker + bulb-out warning | Low current draw | Load resistor (6-8 ohm, 25-50W) |
| Flicker at idle only | PWM interference | Decoder or inline capacitor |
| Flicker over bumps | Loose ground or wiring | Repair connection |
| Flicker after warm-up | Thermal throttling | Improve driver cooling |
| Hyperflashing turn signals | Resistance mismatch | Resistor or LED flasher |
| Flicker with no warning, intermittent | Signal noise or voltage sag | Decoder |
If you are unsure, start with a decoder. It is non-destructive, reversible, and addresses the broadest set of signal-related flicker. Add a resistor only if the bulb-out warning persists.
How to Fix Hyperflashing Turn Signals
Hyperflashing, turn signals blinking far too fast, is the same resistance problem in a different circuit. The flasher module expects an incandescent bulb's current draw. Install an LED and the module thinks a bulb has failed, so it speeds up the blink to alert the driver.
You have two clean fixes. Add a load resistor to each turn signal circuit, matching the original wattage. Or replace the thermal flasher module with an electronic LED-compatible flasher, which removes the resistance dependency altogether.

The electronic flasher is the tidier solution on vehicles that use a replaceable module. On cars where the flasher is integrated into the BCM, resistors are usually the only practical route. RMS Lighting LLC offers CanBus-ready bulbs designed to reduce this problem at the source, though some vehicles still need a resistor to fully satisfy the module.
LED Headlight Anti-Flicker Harness: When You Need One
An LED headlight anti-flicker harness is a plug-and-play inline cable containing capacitors, resistors, or both, installed between the factory connector and the bulb. It conditions the signal so the LED driver receives clean, stable power.
You need one when resistors alone don't solve the problem, when the flicker is intermittent, or when you want a reversible fix that requires no cutting or splicing. Harnesses shine on leased vehicles and classics where you'd rather not modify factory wiring.
Installation typically takes under ten minutes per side. Unplug the factory connector, plug in the harness, connect the bulb. No soldering, no wire taps.
CANbus LED Compatibility: Matching Bulbs to Your Vehicle
CANbus LED compatibility comes down to whether the bulb's driver can satisfy your vehicle's monitoring system unaided. Some bulbs are built CanBus-ready with internal circuitry that mimics halogen draw. Others will always need a resistor or harness.
Match the bulb to the vehicle, not the other way around. Check your owner's manual or original bulb number before ordering. For a 2008-era vehicle with a factory halogen setup, CanBus-ready bulbs often drop straight in with no modification, provided the connector type and housing depth match.
RMS Lighting LLC covers many vehicles with original-style conversion kits built for straightforward installation. If you're unsure which bulb fits, our team can confirm against your vehicle before you buy.
PWM vs. Constant Current Drivers and Thermal Management
Most articles on LED flicker stop at "check your resistors." The deeper answer lives inside the bulb's driver, the circuit board that converts your vehicle's 12-volt supply into the regulated current an LED chip needs. Two architectures dominate, and they behave very differently when your electrical system is less than perfect.
PWM Drivers: Cheap, Common, and Flicker-Prone
A PWM driver controls brightness by switching its output on and off rapidly, typically 200 Hz to 2 kHz, varying the ratio of on-time to off-time. The LED chip sees a square wave, not steady current. At high enough frequencies the eye averages the pulses into a steady glow, but the driver now depends on clean timing from its own oscillator and, in some designs, the vehicle's supply.
The failure mode is interaction. If your vehicle's BCM also uses PWM to dim or monitor the lighting circuit, the two square waves can beat against each other. When frequencies are close but not identical, you get a slow oscillation, a visible pulse or shimmer that comes and goes. That's why some PWM-driven bulbs flicker only at certain RPMs, only with parking lights on, or only when battery voltage drifts.
PWM drivers are cheap to manufacture, which is why they dominate budget bulbs. They are not inherently bad, but they are sensitive to input quality in a way that constant current designs are not.
Constant Current Drivers: The Stable Architecture
A constant current driver holds the LED's current steady regardless of input voltage variation. A feedback loop, typically a sense resistor and control IC, adjusts output continuously so the LED sees, for example, exactly 1.5 amps whether the supply is 11.5 or 14.4 volts. There is no square wave at the LED and no oscillator to beat against the BCM's PWM.
The practical result: a constant current driver tolerates voltage sag, alternator ripple, and mild PWM interference that would send a cheap PWM driver into visible flicker. It also tends to produce more consistent color and brightness across the bulb's life.
The trade-off is cost and heat. Constant current drivers use more components and dissipate more energy as heat inside the driver housing. That heat is the second half of the flicker story.
Thermal Throttling: The Flicker That Shows Up Late
LED chips are efficient, but not lossless. Roughly 20 to 30 percent of the electrical energy going into a high-output LED becomes heat, which must leave the chip (energy.gov). When it can't, because the heatsink is undersized, the cooling fan failed, or the driver is sealed in a housing with no airflow, the driver's thermal protection kicks in.
Thermal throttling reduces output current to protect the chip, a controlled dimming event that looks like flicker, pulsing, or gradual dimming that recovers after the lights cool. The tell is timing: flicker appearing only after 10 to 15 minutes of runtime, only on hot days, or only after the engine bay heat-soaks is almost always thermal.
This is the diagnostic most guides skip. If your lights are steady for the first ten minutes and then start to pulse, do not chase grounds or resistors. Check driver temperature first.
Diagnosing Which Architecture You Have
You usually cannot tell by looking at the bulb. A few practical tests:
- Runtime test. Steady for the first 10-15 minutes, then flicker: thermal. Flicker from the moment you turn them on: electrical or PWM interaction.
- RPM test. Flicker changes with engine speed: PWM interaction or voltage regulation. Flicker is constant regardless of RPM: thermal or a fixed signal mismatch.
- Swap test. Move the suspect bulb to the other side of the vehicle. If the flicker follows the bulb, the driver is the problem. If it stays with the socket, the vehicle is the problem.
- Heat test. With the lights on and flickering, carefully feel the driver housing (use a glove). If it is too hot to hold for more than a second or two, thermal throttling is likely.
Fixes by Architecture
For a PWM-driven bulb flickering due to vehicle interaction, an inline decoder or capacitor is the cheapest fix, it buffers the input so the driver's oscillator isn't disturbed. For a constant current bulb that flickers, the cause is almost always thermal or a genuine voltage supply problem; the fix is airflow, a larger heatsink, or relocating the driver out of a sealed housing.
If you're buying new bulbs and your vehicle is known for aggressive PWM dimming, many late-model trucks and European platforms, a constant current driver is worth the premium. It removes an entire class of flicker before you install anything.
NHTSA vehicle safety information on lighting and visibility
Frequently Asked Questions
How do I get my LED headlights to stop flickering?
Start by confirming the bulbs are CANbus-compatible for your vehicle. If they are, install a load resistor or an anti-flicker harness to stabilize the voltage and satisfy the Body Control Module. Check all wiring connections for looseness or corrosion, and verify the headlight relay is functioning. If flicker persists, test the alternator output for voltage fluctuations. Many flicker problems trace back to the vehicle's computer sending PWM signals to a bulb that was not designed to handle them.
Do LED headlights require a decoder or anti-flicker harness?
Not always, but many vehicles built after 2005 use a CANbus system that monitors bulb resistance. When you swap a halogen bulb for an LED, the lower resistance can trigger flickering or dashboard error codes. A decoder or anti-flicker harness adds the correct resistance back into the circuit so the computer sees a normal load. If your LED kit includes built-in CANbus circuitry, you may not need a separate harness. Check your vehicle's year and trim before buying.
Are flickering LEDs a fire hazard?
Flickering itself is not typically a fire hazard, but the underlying cause can be. Loose wiring, damaged connectors, or a failing relay that causes intermittent contact can generate heat and, in rare cases, spark. If you smell burning or see melted insulation near the headlight assembly, stop driving and inspect the circuit immediately. Voltage drop from undersized wiring also creates heat over time. Fixing the root cause protects both your lighting and your vehicle's electrical system.
What are the downsides of LED headlights?
LED headlights can cause flicker or dashboard error codes in vehicles not designed for them, and cheap kits often have poor beam patterns that scatter light and blind oncoming drivers. Some aftermarket LEDs also produce radio interference or run hot without proper thermal management, leading to reduced output or premature failure. Legal and inspection implications vary by state; some areas require headlights to meet specific beam pattern and color temperature standards. Choosing a tested, vehicle-specific kit reduces most of these issues.